What in Tech is a user-supported site. When you purchase through our links, we may earn an affiliate commission at no additional cost to you. Learn more
Everything you need to know explained in plain English
There is a surprising lack of simple answers to the common queries around I/O shields.
What is an I/O shield?
Do you need one?
How do you install an I/O shield anyway?
Thankfully, the answers to these questions are quick and easy. Today’s feature is here to guide you through everything you need to know about I/O shields.
Table of Contents
What is an IO shield?
An I O shield, or “motherboard input-output shield” is a metal plate that is included with nearly every motherboard on the market.
These plates are designed to be installed at the rear of a PC case where there will be a cutout hole perfectly designed to fit snugly. Each IO shield is designed to match the ports of the motherboard it comes with (i.e. holes in the same locations).
What does an IO shield do?
A PC IO shield has 2 main purposes; the first is to protect against electromagnetic interference (EMI) between your motherboard and the components you are connecting to the IO panel (USB, HDMI, ethernet, etc.).
The second purpose is to act as another physical barrier on the back of the case. Without the IO shield, you will have an enormous hole for dust (and potentially insects) to enter your computer.
One could argue an IO shield also makes the back of your PC look neater too!
What are the Metal flaps/prongs on the IO shield?
As per the example picture below, a majority of mobo IO shields have some little “prongs” or “flaps” near some/all of the port cut-outs.
These are used to allow a part of the metal on the IO shield to lightly touch the metal on the motherboard’s IO panel, this then offers sound static grounding between the shield and your motherboard, further reducing the chances of any electrical interference.
Do I need an IO shield for my PC?
Your motherboard should come with an IO shield (either separately or already pre-installed) so for most users, the question is really why wouldn’t you install the IO shield? It offers some additional protection, improves the look of your device, and is super easy to install as we detail below.
If for whatever reason, you don’t have one, how important is an IO shield? Well, many people (myself included) have gone through periods of not using one with their PC.
The electromagnetic interference protection is not as big a concern now that most connections you make on your IO panel are digital. Your only real risk is if you are plugging something into a port on your motherboard’s IO panel and accidentally slip/have the output touch a part of your motherboard and short a component.
This is a worst-case scenario, and if you’re careful, the chances of something like this happening are very low. If, for example, you were just trying to skip using an IO shield temporarily while a replacement was being delivered, then this isn’t much cause for concern; we all understand being impatient with a shiny new PC. (I’ve had colleagues who have not used one on a build for 5+ years!).
The other problem is of course the rear of your PC being significantly exposed to dust/insects – to me, this issue is the more annoying one, but can be negated with regular cleaning.
Disclaimer: While the risks of not using an IO shield are very low, it’s still a risk that you have to accept – we will always recommend using a shield where possible.
How do I install an IO shield?
Thankfully, installing an IO shield is one of the most simple parts of a PC and should be added to your case before you install your motherboard.
Align the metal I/O plate with the cut-out on the back of your PC case on the inside, the easiest way to establish what way your plate needs to be is by seeing how it aligns with your motherboard, and then matching that position with the orientation your motherboard will be installed.
Take the IO panel on the right for example, if you aligned this motherboard with the back of your PC case and saw that the circular audio ports were on the bottom, then you know you need to install the computer’s IO plate with the circular ports downwards.
If your IO shield has any metal prongs/tongs that are already bent, these should be pointing into the case (as they are supposed to make light contact with the motherboard once it is installed).
Now that you’re aligned, simply apply some pressure and push the IO shield onto the case hole (from the inside).
With some light force, you should hear a “clacking” or “popping” noise to confirm the shield has attached to the case.
And that’s all there is to do on the install IO shield process! When you’re installing your motherboard, the ports should neatly align with the IO shield like the example picture in this section.
If the IO shields prongs/tongs aren’t touching the metal of the motherboard ports, you can lightly bend them to do so, however, most should be set up to touch automatically.
How to remove an IO Shield?
Removing an IO shield is very simple.
First, uninstall your motherboard from the PC case. Once there is nothing connected to your IO panel (other than the PC case it “popped” into), simply push the IO shield with some pressure from the outside of the case inwards.
After a moment or two, the computer IO shield should pop out.
Where can I buy a replacement IO shield?
If your motherboard did not come with an IO plate, my first piece of advice would be to contact the supplier, as every motherboard should absolutely come with one.
If for whatever reason, you can’t get an IO shield replacement from the buyer, I would try these things (in order of recommendation):
Contact your motherboard manufacturer, they will usually be able to re-arrange a replacement.
If not, check Amazon, eBay, or Ali Express for your motherboard model number as they may have the exact model in stock.
There are a couple of mesh IO plates available online, such as the IOmesh. These allow you to fashion your own IO plate by snipping holes in the mesh in the places you need room for input to come through. It’s not as elegant/dustproof as a traditional metal plate, but it’s a nice, easy alternative if needed.
Failing that, you can try the universal IO shield below (recommended for experienced DIY’ers only).
Custom / Universal IO Shield Option
The SuperMicro MCP-260-00011-0N is a simple blank IO shield that is usually used for covering a PC case IO panel cut-out that has no ports.
However, some tech-savvy folk have previously used this as a replacement IO shield by drilling through the necessary holes.
We would strongly recommend trying our replacement steps above before trying this one, and only attempting if you have some competence with cutting metal accurately.
And that’s really is all there is to know for the average PC builders on I/O connector plates! It’s thankfully one of the nicer parts of an installation.
We appreciate it can be a pain if you’re running into problems with a motherboard not including one. But from my experience, manufacturers and suppliers are usually well equipped to supply a replacement (providing the mobo is still in production).
Kaelum Ross, BSc is the Lead Writer at What in Tech and a leading authority in PC hardware and software. With a career as a senior IT professional, Kaelum has led multi-million dollar projects covering everything from bespoke software development to complex Windows hardware upgrades. Today, Kaelum uses his expertise to serve What in Tech's readers and has been featured in numerous global publications including New York Magazine and Lifewire.
Finding the ideal storage solution for desktop and laptop buyers
Short answer:
256GB (or even 128GB) for light/budget users who only browse the internet, watch online videos and use basic programs (Microsoft Office, very light gaming, etc.).
512GB: Users who want more apps, modest media collections & gaming.
1TB: Serious gamers, larger media collections, and/or people who have file-intensive work (video editing, music production, etc.).
2TB: Very heavy gaming/production work – at this point consider mixing a smaller SSD + larger HDD (hard drive) for the budget.
That’s just a very simplistic summary.
For the rest of this feature, we’re going to be breaking down each size, detail what you might want depending on your usage, and recommend the best 256GB, 512GB & 1TB SSDs to ensure you avoid fake options on the market.
(This is a long, in-depth piece, use the contents to guide you!).
Table of Contents
A quick word on where to buy SSDs
Before we get started, we need to touch on the problem with fake SSDs in today’s market.
For whatever reason, storage tends to attract a lot of inauthentic listings that usually use smaller SSDs disguised as a larger size (e.g. a 128GB drive that “pretends” it’s 1TB but will fill up very early).
I point this out because some scammers are cunning and will use a well-reviewed page to deceive buyers into thinking they’re purchasing a well-reputed product (e.g. a listing for a 1TB drive with lots of reviews is changed to a fake 4TB SSD option).
These fake drives are often more common at larger sizes because they lure buyers in with prices around 80-90% less expensive than our top, genuine picks (e.g. a 1TB SSD for $10…).
Unfortunately, we’re here to tell you won’t be able to buy an SSD that cheap for a long time, so be vigilant, keep to our recommendations later in this article if possible, and even when buying from these choices, make sure it is Amazon themselves delivering the product (or a reseller with 98%+ feedback).
If you want to stray to other picks around the web, then we highly recommend purchasing from reputable brands like Corsair and Samsung.
What type of user are you?
The easiest way to find out how much storage you need is by assessing what you will be using it for. Which of the below best fits your needs?
Note: the advice in this section applies to laptops & desktops.
How much storage do you need for gaming?
Gaming is one of the most storage-intensive activities for PC users.
If you like to have a regular library of games, you can very quickly fill up 256GB, 512GB, and even a 1TB drive.
This is all very dependent on what type of games you play and how many you cycle through at one time.
For example, if you’re into big blockbuster titles like Call of Duty: Modern Warfare (231GB!) and Red Dead Redemption 2 (150GB) and like to have many games installed at once, you will want to invest in the largest SSD your budget can afford.
On the other hand, if you perhaps stick to playing a few competitive games, you’ll likely be fine with a much smaller drive (256GB or 512GB) as many of these games are well optimized and run under 30GB (including Fortnite, Overwatch, and League of Legends).
If you have a big library but only play a few of the titles regularly, then your best option will likely be to purchase an SSD + HDD combo: a smaller SSD (say 512GB) for key apps/games, and a larger HDD (1TB-4TB) for the rest of your less-played titles. We talk more about this later in the article.
Is a 256GB SSD enough for gaming?
A 250GB SSD is good for a budget gaming PC that is more focused on running simpler titles (perhaps you only play one or two popular optimized titles like Minecraft or Dota 2).
256GB is not going to be enough for any user that plays larger, modern titles like Cyberpunk 2077 (remember, you don’t get 256GB of raw space to use, after Windows, other apps, and drive configuration, you may only have around half the drive available for your games).
For desktops, we would encourage you to try and go for at least 512GB. For laptop users, if the choice you’re interested in charges significantly more for this size upgrade, then you can make do with 256GB if your gaming library is very light (we would strongly suggest buying a laptop that has a spare solid-state or hard drive slot so that you can upgrade later).
Is a 512GB SSD enough for gaming?
A 500GB SSD is the minimum size we would recommend for a gaming laptop /desktop where possible.
You will still run into some space constraints if you play lots of modern AAA titles, but you should typically be able to have enough space for a limited library at once (so you can play certain games at a time, and then install others using Steam at a later time).
512GB is good enough if you’re the kind of gamer dedicated to one or two titles.
Is a 1TB SSD enough for gaming?
A 1TB SSD is what we would consider a good standard for a serious gamer who likes to play lots of titles.
You’ll have plenty of room for a large array of titles and won’t feel the need to constantly remove/re-install games (of course, this depends on your library, if you have a massive catalog, then a 2TB SSD+ will continue to provide benefits).
If you want this capability but don’t necessarily have the budget, then we recommend going for a 256GB/512GB SSD with a larger hard drive for your game library. Games won’t run/load as fast, but the cost will be a notable difference.
That said, if you can afford it, having the luxury of a large SSD is a great privilege. Compared to HDD speeds, your games will load notably faster.
For some users (like competitive gamers who mainly stick to one game), 1TB may begin to enter the “overkill” range. If this sounds like you, you’ll likely be fine with a 512GB solid-state drive.
How much storage do you need for a Windows 10 / 11 general use PC?
If you are purchasing a laptop or desktop for the purpose of very general uses like browsing the internet, using simple apps (e.g. Microsoft Word/Excel), sending e-mails, and watching YouTube/Netflix, then we think most users will find a 256GB SSD to be good enough.
This is because most modern mainstream usage all happens on the internet. Between cloud storage and streaming videos, you don’t have to worry too much about installing content on your PC.
In some cases, you can even get away with 128GB or 64GB SSD budget options, just beware you’ll be quite limited in application and backup storage (for photos, music, etc.).
The only exception to 256GB being good enough is if you’re the kind of user who has a lot of heavy work documents, or perhaps a very large family photo/video collection. If this sounds like you, going a little further to 512GB would be a good option (but you can also stick with 256GB and purchase a decent flash drive or external hard drive at a later time).
How much storage do you need for video editing?
1TB is the minimum we would recommend for a serious video editing laptop/desktop.
That said, there is very little more demanding on storage than this profession, and you could easily fill up a 1TB drive, especially if you’re an 8K video editor or work with long rolls/footage.
If budget allows, investing in a 2TB+ SSD would be a great option, but if not, you can consider SSD + HDD combos.
If you’re a professional or have a big budget, we’d consider looking at our largest SSD feature, which also covers external drives (a great idea if you want to get a laptop or desktop with a base 1TB drive and then have an enormous, portable solution for your less-used video projects).
How much storage do you need for a Macbook?
If you’re an average user who browses the internet, streams video content, and uses a few simple apps, then you will likely be fine with the 128GB/256GB SSD options a Macbook offers.
If you’re a gamer, video editor, or another type of production user, then the same advice as above applies, you’ll want a Macbook that has a 512GB/1TB storage to give you some leeway in the big apps/files you’ll be working with
(Apple does charge a huge amount for storage increases though, so another great option will be to purchase a small SSD Macbook and also pick up a large flash drive or an external SSD if you don’t need to constantly access the information).
How much storage do you need for music production?
A 500GB SSD is the minimum we would recommend for music producers. Although not as intensive in size as video work, you quickly run into high storage requirements with the various software, recordings, and sound libraries accumulated.
A 1000GB SSD would be the preferred option where possible, 512GB drives will likely be eventually surpassed if you’re a serious producer.
(That said, like the other aforementioned sections, you can comfortably combine a smaller SSD with a larger HDD or external drive, this is likely the best option for most users on a tighter budget).
Breaking down each size
So, the above section defined storage needs based on the type of user you are, which we think is the best way to determine what size SSD you need.
However, if you’re still after more info, we’ve broken down each popular SSD type below and the kind of functions we think each one fulfills (skip to the next section if you’re already comfortable with what size SSD you’re after).
Is a 128GB SSD good enough?
A 128GB SSD is good for a laptop or desktop that isn’t going to be used for much more than internet browsing, streaming, and basic document/picture storage.
Many decent family/work laptops come in this size; as long as you don’t have a large media collection (remember, Netflix/YouTube don’t count as they’re all streamed online), you’ll be fine with this option as a budget choice.
(Some users can even get away with 64GB choices! But we’d try and stick to 128GB, having some leeway on a PC you intend to use for a while tends to be a nice perk).
If you’re a gamer, you might get away with 1 to 2 popular games installed if they’re not too large (e.g. Minecraft/Overwatch) but we’d really recommend a larger choice.
Is a 256GB SSD good enough?
A 256GB SSD will feel like a luxury for most office/general-use computers. You’ll have plenty of space for office documents and most family photo/video collections (providing they’re not very large).
It’s a comfortable minimum for gamers who don’t play huge titles or don’t mind re-installing titles, but 512GB+ is really the ideal.
A 250GB SSD isn’t recommended for users who are heavier production users (video, photo and music production, game development, or programming); you’ll definitely want to consider larger SSDs for these areas.
Many 256GB laptops come with a second drive bay to upgrade at a later time, we always recommend checking to see if your choice has this (it’s not a deal-breaker if not, but a nice bonus if you’re not 100% sure you won’t need more later).
Is SSD 512GB good enough?
512GB is likely where things become overkill for a family/office computer unless you have a huge photo/video collection or work in an industry that demands saving large office files.
This is, however, the size where gamers and some production users will begin to feel more comfortable. A 512GB SSD + larger HDD is one of our favorite recommendations for gamers.
The only common area we don’t consider 500GB a suitable minimum is video editing (see next).
Is 1TB good enough?
1TB is for serious production users (video editors, music producers, etc.) who demand significant, high-speed storage for larger files (you’d be surprised how quickly you can fill up space when working in these areas, so a serious SSD solution is best).
1000GB is also excellent for gamers with diverse libraries, especially those who want to play lots of games regularly (to make full use of the fast load times an SSD enables).
If you think many of the files/games you store may not be accessed super regularly, then we would recommend looking at a smaller SSD + Hard drive combo to ease your budget.
(Don’t consider 1TB for a general use PC unless you have a good reason/budget, we expect this will often be unnecessary).
Is 2TB good enough?
2TB SSDs are for users who are either serious gamers or professionals who will be working with large video/audio files or miscellaneous work (database files, game dev projects, etc.).
We would say that a 2000GB SSD is likely more than most gamers will need (unless you simply want the best setup no matter what); yes, you can fill this space up with games, but if you don’t use all 2TBs worth regularly, you’ll be better storing many of your lesser-played games on a second largest (and cheaper) hard drive.
You won’t see many 2TB laptop options as these power users are less common and usually stray to home PCs. That said, you can easily build a larger storage solution if you need portability by looking at a 1TB laptop with an extra drive bay. You can also pick up one of the largest external SSDs which is an excellent balance between storage & cost.
Hard Drives vs Solid State Drives?
If you’re like most users, you’re considering how much you want to invest in an SSD vs HDD.
HDDs are the more traditional hard disk format of storage that were more common in the last couple of decades.
Many PCs today (especially laptops) focus on providing SSD storage
Can I use SSDs and HDDs together?
Depending on what your desktop/laptop has available, yes!
In most cases, if you’re building a PC (or even if you’re buying a pre-built desktop) a majority of PC cases will come with spare 3.5″ and 2.5″ drive bays for SATA SSDs and HDDs (your motherboard may also include space for ultra-fast NVMe M.2 SSDs also).
For laptops, many DO come with spare SATA ports for 2.5″ HDDs or 2.5″ SSDs (typically this is the size of the drive bay available), it’s also becoming increasingly common for laptops to come with spare M.2 slots for NVMe storage (which is expensive, but the fastest around).
That said, it’s not a guarantee for a laptop to come with this option, so check the manufacturer’s website (you’ll often also find user reviews confirming if the model you’re after has the capacity to upgrade storage also).
If you like the look of a laptop and it doesn’t have upgrade capacity, we wouldn’t say this is a dealbreaker. You can focus more of your budget on getting a large primary SSD or purchasing an external drive for your lesser-used files/backup.
Either way, we would recommend using both of these formats if you are a user that demands a lot of space but has budget limitations.
SSD vs HDD Head-to-Head
Speed – SSD: You will get a significantly better read & write speed with an SSD, which is the main reason manufacturers are moving towards them today. This is why we’ll always recommend installing your operating system and key apps/games/files on an SSD over an HDD.
Price – HDD: HDDs are usually notably cheaper which is why they’re often recommended for larger storage requirements.
Reliability – Tie: It used to be the case that HDDs had better longevity, but with most storage innovation focussed on solid-state drives today, SSDs now have a very similar level of reliability (in fact, because of their lack of moving parts, they can often be the better choice, especially for portable solutions like laptops).
Noise – SSD: A SSD is the easy winner here, without the physical disk spinning inside like a hard drive, the flash memory an SSD operates on is significantly quieter, you’ll find all of our top quiet laptop choices use them.
Best usage: As you can probably tell from the above factors, there’s a reason SSDs are becoming the de facto standard for most manufacturers. Where hard drives still rain supreme, are for lesser-used/backup storage where there is no point in forking out the extra price tag for a solid-state drive.
Best SSD + HDD combos
Providing you have the physical space in your PC, you can mix and match what sizes you like, there’s no set rule/best combination.
As a general rule of thumb though, we would recommend getting a solid-state drive large enough for your operating system, core apps (internet browser, Microsoft Office, etc.) & games/media you use regularly.
For most people, this will be a 256GB or 512GB SSD (1TB+ if you’re a big gamer/production user), and then whatever hard drive size makes sense for your needs (1-2TB will suit most, but you can get HDDs up to 16GB if desired!).
Best SSDs by Type
For nearly every pick below, we rate the same product as the best for different sizes (and we’ll make it clear where there are exceptions) – so the best 256GB 2.5″ SSD is the same product range as our top 1TB 2.5″ SSD.
You’ll also notice some sizes are slightly different (e.g. 250GB instead of 256GB), we’d recommend ignoring any differences where drive sizes are very close (we explain why in the FAQs below).
Best 2.5″ SATA SSD (256GB – 2TB): SanDisk SSD PLUS
One of the most popular SSDs on the market for a good reason, SanDisk has created a very reliable, cost-friendly 2.5″ SSD that reaches great speeds for by its SATA standards – perfect for serious desktop storage.
Best M.2 NVMe SSD (256GB – 2TB): SAMSUNG 970 EVO Plus
With stunning 3500/3300 read/write speeds (up to) that are replicated in real-world environments better than most of its counterparts at a competitive price point, the 970 EVO is the choice for someone after a PCIe SSD that is all about performance and can stretch their budget further than a traditional SATA drive.
Samsung stands alongside SanDisk as a behemoth in the storage space and we rate them very highly for their performance, especially when investing in expensive, premium storage.
Note: For laptop users, we would recommend the 980 EVO Plus variation, which will run slightly cooler (desktop/PC builders should stick to the 970).
Best Portable / External SSD (512GB – 2TB): SAMSUNG T7
Throughout this guide, we’ve recommended that if you aren’t able to upgrade your internal storage any further, an external solid-state drive is a great alternative. Samsung has created a competitively priced, durable drive here that runs on NVMe to reach fantastic speeds alongside gen 2 USB 3.2. SanDisk also has a great option in this market should the T7 be unavailable.
Best mSATA SSD (128GB – 1TB): Kingshark Gamer mSATA
mSATA is becoming increasingly less common in today’s market and we recommend the other types of SSDs where possible.
Still, if you have a laptop that only has an mSATA slot available, Kingshark has created a decent option here. This would also be an excellent upgrade if you have an older laptop that only runs on a HDD.
Yes! Not only is this possible but it’s becoming the standard, especially for laptops. You only really need to consider a hard drive if you’re looking at needing lots of storage and need
Best laptop SSD?
There is no universal type of laptop SSD as it varies depending on your laptops’ compatibility options (and your budget!).
Generally speaking, the most common laptop drives are 2.5″ SATA (same as our desktop picks above), mSATA/mini-SATA SSDs (same functionality as 2.5″ but smaller), or M.2 (SATA or PCIe, both are significantly faster than traditional SATA but PCIe moreso).
In other words, check with the manufacturer’s website what drive options there are for your specific laptop and go from there (we have recommendations for all types in the section above).
Best type of SSD (NVMe vs SATA)?
Traditional SATA drives (2.5″ and mSATA) are the slowest of all the SSD choices (still decent overall and perfectly fine), SATA M.2 are notably faster but more expensive & PCI-E M.2 (NVMe) drives are the fastest but run the highest cost.
Note that when considering these different types of SSDs, it really comes down to what your laptop/desktop has available (in terms of SATA/M.2 & PCIe ports) so be sure to check before making any purchase decisions.
How long do SSDs last?
SSDs typically last 10 years by today’s average estimates. This of course varies dramatically depending on how much you use it, physical care (i.e. no using your SSD as a tennis ball!) & how often you replace (read & write) data on the SSD.
That’s not to strike fear in you though, there’s a reason SSDs are now the common standard in storage, they last as good as any mainstream drive solution in 2022.
240GB vs 256GB SSD, 480GB vs 512GB SSD & 960GB vs 1TB SSD difference?
You may have noticed there are many confusing differences in sizes when shopping for SSDs; drives that advertise as 240GB, 250GB & 256GB (with similar minor variations in higher sizes).
Because of the way SSDs operate, there is typically a “usable space” that is slightly smaller than the usual 256GB/512GB/1TB “true” sizes.
This is because an SSD performs better and has increased longevity when not completely full – generally speaking, 10-20% of the drive should remain empty.
In nearly every case, all of these drives have the same amount of actual space (256, 512GB, etc), but many drives like to lock the maximum space to ensure drive health (even many drives that advertise as 256GB end up being 230-240GB on arrival).
Note, there technically are exceptions to this rule (i.e. drives that operate on slightly different technology), but without getting needlessly complex, we would suggest it’s worth treating 240GB and 256GB SSDs (and similar variations) the same during your search.
Best SSD + RAM combo/ratio
Although not strictly related, we see a lot of our users curious over what combination of SSD and RAM is typically best.
As always, these things are far from set in stone, some users will want 1TB of storage and 8GB RAM, others 32GB RAM and 256GB storage (though unlikely!)
Generally, the RAM sweet spot is 8GB-16GB, and the storage sweet spot is 256GB-1TB. If you’re not very experienced with PC buying, operating within this spectrum based on your budget will be your best bet.
If you’re interested in the details of RAM speed, we have an extensive feature covering it.
Is 16GB RAM 512GB SSD good enough for a laptop?
This combination is one of the most common in laptops today, and for a good reason!
For a majority of laptop users (work, general use, and some light gaming), 16GB RAM + 512GB SSD is a great balance. 16GB ensures you are relatively “future-proofed” for the next several years and 512GB offers plenty of space for apps, files, and smaller games.
If you’re a production user (video editor, etc.) you may want to invest in 32GB if possible, but more importantly, you will appreciate 1TB+ in storage (we would say this is typically going to be a higher priority upgrade than surpassing 16GB RAM).
Is 8GB RAM 256GB SSD good enough for a laptop?
8GB RAM + 256GB Storage is a good budget standard for most users. If you’re the kind of person to mostly consume online content (social media, Netflix, Youtube, etc.), we expect you’ll be fine with 256GB in storage.
Of course, upgrading to 16GB RAM would be preferable, what we would recommend, if possible, is picking up a laptop that has 1 stick of 8GB RAM with a spare second slot so later on, you can add a second stick of 8GB to get to that nice 16GB upgrade.
Direct Head-to-Heads
The key information about today’s features is in the sections above.
If, however, you find yourself stuck between 2 specific sizes, we’ve built this quick-fire list of comparisons to give you some indication.
Important point: With these head-to-heads, we are assuming the 2 drives you are picking between have the same secondary specs (speed, etc.). Make sure to consider you’re not buying a slower, larger drive over a faster, smaller one (as for many users, the latter may be the better pick overall).
128GB vs 256GB SSD
Typically, we would recommend people go with 256GB if possible. Even though many users can get by on 128GB, 256GB gives a nice safety net as files, work documents and family photos manage to fill more and more storage over time (it’s not fun running into limitations and feeling like you need to keep your PC super clean at all times).
That said, we appreciate budget is a big concern for users (especially if you’re looking at a Macbook, where the upgrade to 256GB can be very expensive). If this sounds like you, then rest assured, you can get by on 128GB, especially if you’re mainly focused on internet/cloud/streaming usage. You’ll also always be able to buy an external SSD if your storage isn’t looking enough.
One important thing to bear in mind when looking at the smallest drives is, assuming you are using either choice as your main storage, the drive configuration, operating system, and your key apps will likely take up around 30-40GB of space.
On a 256GB, this is only 10-20%, but on a 128GB SSD, it’s cold be p to 40% of your space being taken before you consider adding media/games. For many this is fine, but just bear it in mind if you think you have things to store.
128GB vs 512GB SSD
We see this question asked by some readers but really, these drives are in separate leagues.
128GB is for the budget user who is confident they only need a small amount of space for media/documents (most of their usage likely being online).
A 512GB SSD, on the other hand, is for users who have a larger budget and want to be able to store games, larger media collections, and/or have room for some novice production use (music, photo editing, etc.).
Although we’d recommend 512GB where possible, it is going to be overkill for many simple users who don’t do much more than browse the internet/e-mails, so let your budget & intentions decide.
256GB vs 512GB SSD
One of the most common storage questions is between 256GB and 512GB as most mainstream laptops come in one of these two specifications.
256GB will suit most users after a simple family/work computer used mostly for online content, basic document storage, and even light gaming.
512GB is better for those who are more serious about gaming, have large work/media collections to store, or do not want to worry about managing storage as much.
We imagine most people building a desktop PC will likely be the sort to at least want a 512GB SSD (unless you plan on running a 256GB SSD + large HDD combination).
512GB vs 1TB SSD
512GB will suit a majority of average users fine, even those after a long-lasting laptop or desktop.
The big exceptions here are gamers, large media collectors, and serious production users (video editors and similar) who are going to demand serious, fast storage.
Remember also, this is the period of storage where combining say, a 512GB SSD with a 512GB/1TB HDD may make a lot more sense for your budget.
1TB vs 2TB SSD
1TB is a generous size for a majority of users, with plenty of room for the games you’re currently playing, demanding work storage & fairly large media collections.
There will, however, certainly be enthusiast gamers, collectors and serious production users who would benefit from the jump to 2TB (if you’re working in 4K video editing, for example, this can fill up faster than you can imagine).
Remember also that as we get into these larger drives, the price increases are steep, so a 512GB/1TB SSD for your main files alongside a larger HDD for your secondary documents/games may suit you best.
2TB vs 4TB SSD
We’re getting to the very serious storage now. Both of these picks are really only for enthusiast PC builders, hardcore gamers who demand lots of game storage at once, or production users who are dealing with a lot of content.
This really comes down to personal preference. We expect most users can manage with a 2TB drive if they keep things clean (e.g. keep games in their Steam library uninstalled when they haven’t played for a few months, organize video projects) but there’s no denying that the freedom of 4 terabytes is a wonderful feeling.
In other words, it’s a choice between budget and convenience, which is more important to you?
If you need an even bigger option than 4TB (say, if you’re trying to build the best PC possible, a server, or something special), check out our feature on the largest SSDs available today.
Final Thoughts
And there you have it! We’re pretty confident this is everything you need to comfortably know as someone looking at 256GB vs 512GB vs 1TB solid-state drives.
To sum up: the smaller drives are going to suit simple, internet-using family computers and those for basic work. 256GB or 512GB will be enough if this sounds like you.
The larger drives will be more suited toward gamers, serious production users, and enthusiasts with big budgets.
And remember, where possible, try to look for a laptop (or PC case) that has space for upgrades later (e.g. spare SATA/m.2 PCIe ports and drive bays). If that isn’t possible for your desired choice, then there are also always the external SSDs above which are great options.
Best of luck, and be careful to avoid the fake drives around by sticking to our recommendations above where possible!
Step 1 – Install Wii U USB GCN Adapter / vJoy Device Driver
Firstly, go to Massive’s Gamecube adapter blog and download the latest version of the Wii U USB GCN Adapter (there will be a link near the top of the page).
Once downloaded, you’ll get a standard install prompt, follow the first basic steps as below:
Install wherever you like.
Choose your shortcut preference.
We’ll access the app later so you may like to create a desktop icon.
After these basic steps, you should see the below, click Install.
The program will then run through a brief install and pop-up with the below window.
Note: Please follow this instruction carefully – Ensure you have “WUP-028” selected in the dropdown box (as per the green box below, NOT something else like the red box highlight).
Once WUP-028 is selected, click the “Replace Driver” button (sometimes “Reinstall Driver”).
You should shortly receive the below message after doing this.
Once you close that window, the vJoy Device Driver setup will appear. Click Next.
In the next window, leave the below components ticked/click Next.
Then install.
You may be presented with a Windows Security prompt. If so click “Install” again.
Following this, you’ll get another successful install prompt.
Note: you may receive the below error message (or something similar) after this install. Please disregard this, it doesn’t affect the functionality.
And with that, step 1 is completed! This was required for your PC to “recognize” the Gamecube controller and its inputs.
This first step is also all you need to use a Gamecube Controller on Dolphin (and many other popular emulators). We’ll need to go a little further for Steam/PC games though.
Optional step (recommended)
After following step 1, you should:
Install the latest Microsoft .NET framework available here (very simple/small install similar to the above).
Restart your PC to ensure the software is fully recognized before moving on.
Step 2 – Install x360ce
Next, what we’re going to do is get your adapter/controllers recognized as Xbox 360 gamepads using the x360ce Gamecube config.
This allows Steam to pick them up for its wide library of 360-compatible games.
At the top of the page, you should see something similar to the below.
2021 Update: x360ce has released a brand new version (4 or higher) that is suitable for both 32 and 64-bit games in one .exe and is much easier (does not require step 4 of this guide).
We highly recommend trying to download/use version 4+ first, continue to follow the below instructions but ignore the need to download/extract separate 32-bit & 64-bit versions and simply follow the steps for the single 4+ version download.
If you have any issues with version 4+, download the 32-bit & 64-bit versions and follow all steps below.
Download both the 32-bit and 64-bit versions (each is used depending on if the game you’re playing is 32/64-bit).
Once downloaded, we recommend unzipping the files into 2 separate folders. 1 for the 64-bit version, 1 for the 32-bit version.
Our unzipped x64 version is displayed below.
Once that’s done, we’ll then install both versions separately. The process is the same for each version, we’ve used the 64-bit one to demonstrate below.
To start, click on the _x64 file, you will be presented with the below warning.
Click “Create” and it will generate the necessary file/close the warning.
After this, you will receive the below window.
This means the program picking up your “vJoy Device” (i.e. Gamecube adapter controllers) and recognizing it needs to be configured.
With the same ticks as the below (including “search the internet”) click Next >
What this does is search the internet for the necessary x360ce Gamecube controller driver (you’re far from the first person to do this!).
You’ll receive the below window, click Finish.
Note: After clicking Finish, you may receive another “New Device Detected” window. Don’t worry, this is just the same thing happening for each of your adapter ports. Just click “Next” and “Finish” multiple (usually 4) times until it has concluded.
Once these are done, you’ll be presented with the below screen.
Notice the 4 green squares next to each Controller? That’s x360ce picking up your adapter. Try restarting if these don’t appear.
Keeping the x360ce window open (we’ll come back later), open the Wii U GCN adapter.
If you added a desktop shortcut, simply click that.
If not, just press the Windows key and type “GCN” and it will appear in the search as below:
You’ll see the below once you open the app. Click “Start”.
The below message (or some similar notification of success) will appear.
Now, return to x360ce.
With your controller plugged into port 1, on the “controller 1” tab, you will now see the Xbox 360 controller buttons on your screen respond when you press down on the Gamecube pad and analog stick!
Nearly perfect, the last thing we need to do is change some of the analog stick sensitivity settings.
For each of the controllers (1-4), go to the “left thumb” tab and change the Anti-Dead Zone settings to 80% and the Dead Zone settings to 30% (as per the green boxes).
This will ensure your analog stick behaves exactly like it would on the Wii U/Nintendo Switch.
And that’s step 3!
Make sure to complete the same setup for the 32-bit version.
Step 4 – Add Necessary files to Steam game folder
2021 Update: If you are using the newest version of x360ce (4 or higher) then congrats, step 4 shouldn’t be required!
When using version 4+, make sure to keep x360ce running in the background when playing games.
If you have issues with version 4+, then follow the above steps to download the 32-bit and 64-bit versions and continue with the below once you reach step 4…
You’re close! The last step to play Steam games with a Gamecube controller is placing the x360ce files into the game folder.
After you complete step 3, go back to the x360ce folder (either 32/64-bit) and you will now see 3 files as below:
What we’re going to do is copy these files to the game’s root Steam folder.
This is most commonly “Local Disc (C:) – > Program Files (x86) – > Steam -> Steamapps – > Common – >*Game Name*“.
If it isn’t exactly that, don’t worry. Have a little look around in your files/search and you will find it.
For this example, I am using Super Meat Boy.
Super Meat Boy is a 32-bit game.
For these, you need to copy the 3 32-bit x360ce files and paste them into the Super Meat Boy root folder, it should then look like the below.
This is what allows the game to recognize the “Xbox 360” controller.
And that’s all there is to it!
Once you’ve done this, open the game via Steam and you will now have a working GCN controller to use with PC games!
32-bit vs 64-bit games
If you’re wondering how you know whether a game is 32 or 64-bit, simply open the x360ce .exe file once you have put the 3 files in the game folder.
If it is the wrong bit-type, you’ll get a warning message and can then simply replace the 3 files with the other bit version.
The below is me trying to put the 64-bit x360ce version in the Super Meat Boy directory as an example:
Not working?
If the above steps are not working, I would encourage you to try the below (in order):
Retry the steps, ensuring you complete the optional/recommended sections (restarting after step 1, etc).
Check out our alternative option below for non-Steam games (will work with Steam games also).
If none of the above works and you have tried your GCN adapter in multiple ports, there may be an issue with your adapter. Try a replacement version (either official or non-official).
How to use a Gamecube Controller on non-Steam games
If you want to use a Game controller for PC games other than Steam, there’s a couple of other options.
For Xbox 360 compatible non-Steam games
If the game you’re trying to play still supports the 360 controller, a majority of these will work by following the same steps above and placing the 3 32 or 64-bit x360ce files into the games root folder.
The only change is that the location of the root game folder will be different from the “steam – > steamapps – > common” layout above, but search for the game in your Program Files and you should find it.
For all other games
If you’re trying to play a game without Xbox 360 controller support, your best option is likely controller mapping software.
This allows you to “map” your Gamecube buttons to the mouse and keyboard actions your game users (e.g. you could map “right-click” to the green “A button”).
We would recommend Xpadder to do this (the best software in this space for many years, and is good for other controllers too).
If you’re looking for a free version, however, AntiMicro is also great.
This approach takes a bit more configuring but if you Google something like “Gamecube Xpadder config” you will find other people who have already mapped out the controller for popular games.
Kaelum Ross, BSc is the Lead Writer at What in Tech and a leading authority in PC hardware and software. With a career as a senior IT professional, Kaelum has led multi-million dollar projects covering everything from bespoke software development to complex Windows hardware upgrades. Today, Kaelum uses his expertise to serve What in Tech's readers and has been featured in numerous global publications including New York Magazine and Lifewire.
This feature has been updated after reviewing the latest and upcoming offerings from each brand in 2026. Our top brand picks remain the same this time, but a couple of case recommendations have changed.
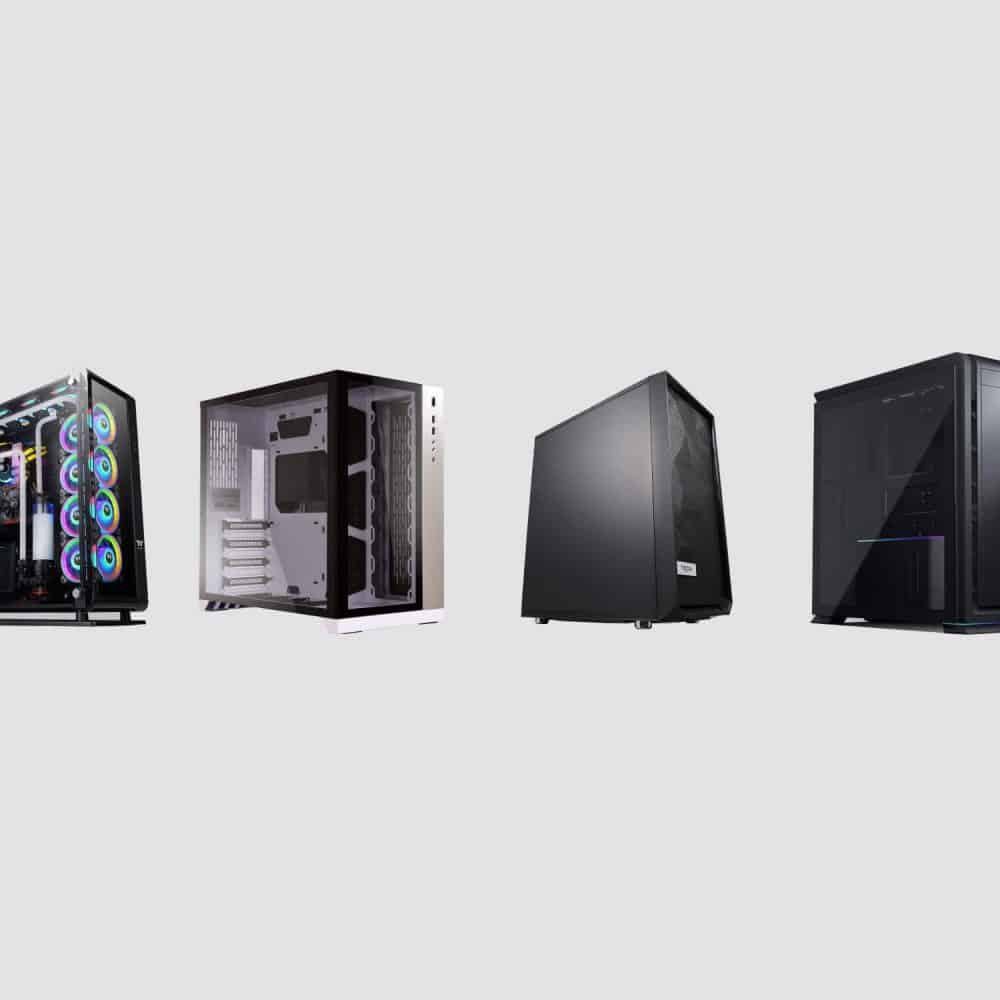
After our endless amounts of case reviews over different categories, budgets, shapes, and sizes, it’s clear that some chassis brands have shined better than others.
Oh boy, was it hard to decide how to rank this top spot.
Specifically, the battle between Lian-Li and Fractal Design was neck and neck; with both manufacturers offering absolutely incredible cases across most typical buying criteria.
But as it stands right now, we have to give the accolade to Lian-Li.
You may not be as familiar with this manufacturer as say, Corsair or Thermaltake.
But they’ve been in the PC Case business for a long time. Their flagship models today strike an incredible balance between aesthetics, build quality, internal spec, airflow, and cooling capability.
All wrapped into price tags that feel too good to be true next to some of its competitors.
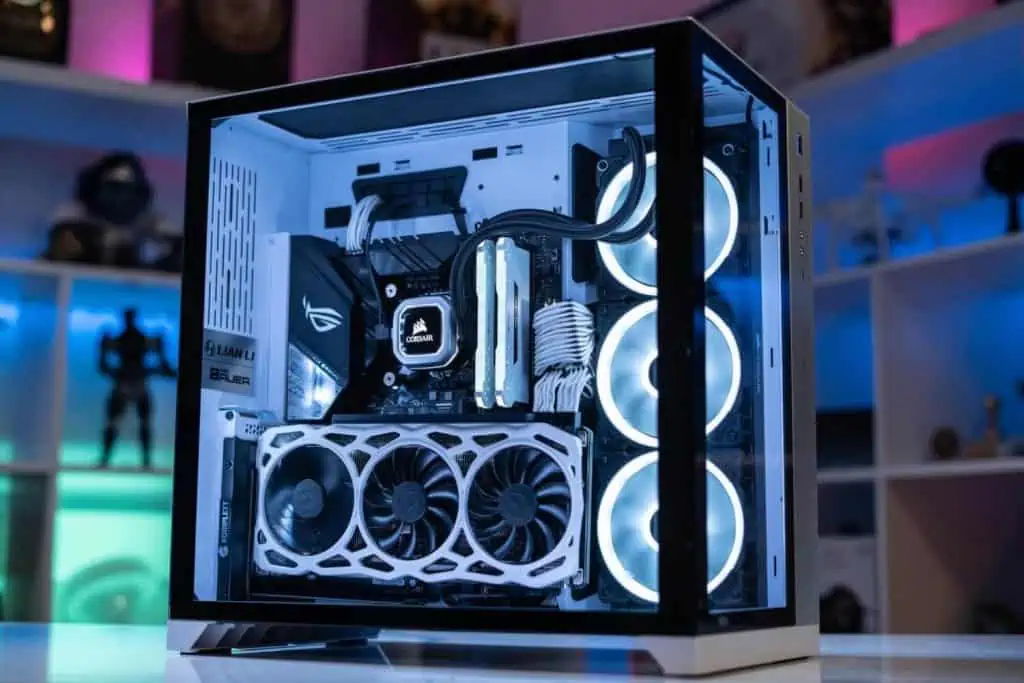
The PC-011 Dynamic, in particular, is what we consider to be the best PC case available today.
Lian-Li is a seasoned manufacturer on the top of their game.
You really can’t beat their top cases for overall value whether you’re after a PC case for gaming, streaming, or production (whether high-end or more budget-leaning).
All of this is why we consider Lian-Li the best computer case brand on the market today.
2026 update: Lian-Li remains my top PC brand pick for 5 years running. Although the rest of the list is worthy of your consideration, especially if you’re interested in silence (Fractal) or other aesthetics, I’ve been really appreciating Lian-Li’s “quality over quantity” approach in terms of new releases (like the Mini-X O11D), and their flagship cases stand strong.
Best PC Case Brand for Silent Builds: Fractal Design
Now like we said, our number one pick on this list was very hard to finalize.
Fractal Design feels just as deserving to take the top spot.
With a similarly incredible execution in balancing quality, design, and internal specs with fantastic pricing, Fractal has been my personal go-to choice for PC cases for a long time.
There is one key area that separates Fractal and Lian-Li: noise vs airflow.
They manage to achieve this by surrounding their high-quality exteriors with sound dampening insulation, setups that minimize internal vibrations, and side panels that are (usually) covered in thick metal instead of thinner tempered glass.
With this approach comes a set of very minimalist PC case designs that are beautifully subtle and practically silent (particularly in their mid/high-end models).
With that increased insulation comes a slight loss in airflow/cooling capability.
Now make no mistake, for the amount of sound dampening Fractal achieves in its cases, they still perform very well in temperature benchmarks (often beating many cases that have more ventilation openings) and are more than capable of running a powerful PC.
We just think that for the average builder, the perks of slightly superior airflow and a case focussed on high visibility (for your beautiful RGB components!) will win you over.
But if having a quiet case is even a little bit important to you, know that Fractal Design is easily one of the best PC case brands today, and its flagship models are incredible products.
Even Phantek’s cheap to mid-range cases are often built with a level of quality that you’d pay more for from many other brands.
We don’t think their offerings in the mid-range are quite as good as Lian-Li and Fractal.
But that’s only because the PC-011 and the Define R5/7 are such fantastic computer cases, it’s hard to compete with them.
But if your budget is a little shorter than those chassis, or is much higher that you’re looking for a specialist case like the Enthoo 719, then Phanteks are still well worth considering.
We’re sure most of you are very familiar with NZXT, and there’s a good reason for that.
Few other brands have made their mark through sticking to a slick, striking aesthetic as this manufacturer.
Most of the flagship models have decent SGCC steel build qualities with some beautiful matte finishes.
NZXT’s cases aren’t just pretty though; they also offer plenty of utility for a large variety of builds.
Their flagship H510 model in particular is a fantastic mid-range case, and we appreciate that they offer comparable quality across their mATX and ITX variants.
If the aesthetic of NZXT is up your alley, know their cases are a great choice for more than just looks.
Most Popular PC Case Brand (Best for Variety): Corsair
There’s probably not a person reading this who doesn’t have some dealing with Corsair.
This classic brand has had cases featured throughout tons of our reviews.
One case, in particular, has been featured more than any other to date: the Corsair Crystal Series 680X (one of the best premium cases available today).
Although we like cases like the PC-011 and the Define R5/7 over Corsair’s mid-range offerings, it is simply incredible how many chassis this brand manufactures at any one time.
On the other end of the variety spectrum is SilverStone.
This classic manufacturer is great at sticking to what it knows best: making traditional-style no-frills PC cases.
And we don’t mean that negatively by any means.
SilverStone cases still look great and perform very well for the price, if you’re after something more minimalist (and aren’t interested in Fractal Design) then this should be your go-to.
Another area they shine in is in the world of horizontal PC cases; combined with their simplistic designs, SilverStone cases are perfect for someone looking for an HTPC case.
While not taking any particular top spot, InWin is still a great PC brand that we particularly enjoy for creating some very unique offerings that perform as well as they look.
Cases like the D-Frame, 905, A1 Plus, and 925 have designs you simply won’t find from any other manufacturer; so don’t write them off.
Another very popular manufacturer, Cooler Master has made a name for themselves by offering a great variety of cases in all different shapes and sizes – particularly working well as a cheap PC case brand, with a huge array of budget options.
Both their cheap and premium options are worth considering; our standout choice from them is easily the Cosmos C700P – this is one of the best choices for high-end enthusiast builds.
The only reason we don’t rank them higher is some of the other manufacturers above simply tend to offer more with their competing products in each price range.
Last but not least is another option for those after a quiet PC case.
As much as we love Fractal Design, if for whatever reason you are looking for an alternative (be it aesthetic or stock/budget issues), Be Quiet!’s range, as the name would suggest, offer excellent noise-reduction solutions.
The Silent Base 801 in particular is a stand-out offering from them, which you can read more about in our coverage here.
While the above are the best PC case brands on the market today, there are still some other great manufacturers that you shouldn’t look down upon if you’ve found something out of this list that takes your eye.
We have, for example, previously recommended cases from Antec, ASUS, Anidees, Cougar, Azza, EVGA & darkFlash.
None of these brands are bad, (Antec for instance once manufactured one of the most popular cases on the market).
It’s just that the above 10 will cover a large majority of user needs and be the best balance of build quality, price, and features.
Kaelum Ross, BSc is the Lead Writer at What in Tech and a leading authority in PC hardware and software. With a career as a senior IT professional, Kaelum has led multi-million dollar projects covering everything from bespoke software development to complex Windows hardware upgrades. Today, Kaelum uses his expertise to serve What in Tech's readers and has been featured in numerous global publications including New York Magazine and Lifewire.
I updated this feature to cover the latest releases of 2026. None of the brand picks have changed this time, but I’ve updated a couple of the monitor recommendations throughout the article.
Are Dell monitors good?
Is HP overpriced?
When searching for your next display, it can be overwhelming when you’re met with so many options, one of your many questions is likely which PC monitor brands you should consider.
Well, today, we will be helping you answer just that!
This feature will take you through everything from the best gaming monitor brands, to the best manufacturers for work displays. We’ll also include where each brand shines the most.
We’ve ranked this list into 3 parts; “The Top 7” & “Worth Considering” for the best 15 brands, and a few more “Honorable Mentions” for certain companies who we don’t rank as the best, but shouldn’t be completely written off.
Our 7 front-runners are the best monitor manufacturers at balancing great screen specs, gorgeous design/build quality, reputation, and price.
Bear in mind that these manufacturers have 100s of different monitors and who is best will often depend on your needs (resolution, framerate, budget, etc.).
This is why we’ve included the best picks for each brand to guide you while we go.
Best Overall Monitor Brand: Dell / Alienware
At the top of our list is the behemoth manufacturer in all things technology.
Texas-founded Dell has always been a frontrunner in providing a great mixture of budget desktops with everything a simple general/work users would want, and then higher-end displays with great color gamuts, contrast ratios and build qualities.
At this point, however, what makes us consider Dell the best manufacturer overall is their ownership of the Alienware brand.
With this combination, Dell now has something for everybody:
Cheap IPS panels that offer great budget use
Mid-range monitors for gaming, video/photo work, or a premium office setup
With Alienware; high-end monitors that represent the best display technology on offer today with incredible options for premium gamers.
A huge majority of their options also come at a very competitive price-point (you don’t feel like you’re paying an unfair amount for the reputation/service of a well-known brand with many of Dell’s screens).
Our main highlighted monitor today is the SE2719h. This display is one of the best balances between specs and price for your standard user.
With a 27 inch screen, IPS panel, fantastic picture quality for the price, and all hosted in a gorgeous build quality/design, there’s a reason why this is one of the most popular monitors on the market (and with its thin bezels, would be perfect for a dual-screen setup).
For gamers, the Alienware AW2721D is one of the best monitors for gaming today and tops our list of 1440p 240hz screens (a very hard category with a lot of competition). This is a premium monitor of course, and we have more budget-friendly options highlighted by other manufacturers below.
With something for everybody, and often with specs/prices rivaling other frontrunners, we think Dell is on the top of their game today and well deserving of the best PC monitor brand accolade.
2026 update: Dell, alongside their Alienware subsidiary, remain my top pick for 4 years running. With a solid stream of new releases and some fantastic products old and new that stand the test of time, Dell has done a good job at providing options for every major use type and budget in today’s market.
While Dell is very capable in the gaming sector (especially at the premium range with Alienware), ASUS gives them a run for their money in this category and is equally worth your consideration.
With a huge range of monitors, Taiwanese-based ASUS has its fingers in all of the gaming pies; with some very innovative monitors in the high and low-end price points.
Where we think they shine most, however, is in the mid-range offerings.
Few (if any) monitor companies have more compelling balances between specs for the average gamer, build quality, and price.
Taking our best ASUS monitor pick, the VG27VH1B, as an example: offering 165/144hz options, very fast 1ms MPRT response time, a decent 1500R immersive curvature, AMD Freesync & Nvidia G-sync compatibility, a fantastic 120% sRGB color gamut great technology for sharp blacks all hosted in a full HD 27″ offering with perfect, close-to-frameless build quality.
For all of this to come in its relatively cheap price tag is a fantastic offering and demonstrates just how capable ASUS are of providing some of the best value monitors for gaming.
Don’t count them out if you’re after a more expensive offering too; we constantly feature ASUS across our articles touting more premium specs like the highest Hz, 1440p 240hz, 4k 144hz & 1440p 144hz ultrawide monitors.
While there are a few great contenders on this list for gaming, ASUS offers the best balance of specs and value in today’s market and is our pick for the best gaming monitor manufacturer.
Our next display manufacturer is one that needs no introduction…
One of the biggest players in the TV space, Samsung has extended its reach to providing its efficient screen supply chains to create high-quality monitors and very competitive offerings in some of the main PC display categories.
Samsung positions many of its offerings as business monitors, with lightweight, cheap yet deceptively decent LED screens leading their budget range, their monitors are a compelling choice if you want a great picture quality for general use/media without breaking the bank.
Our best Samsung monitor pick is a shining example of that; the LS24R356FZNXZA is a gorgeous full HD display hosted in a fantastic shell and is a very close competitor to our top Dell pick if you’re after something simple but capable of a beautiful picture for the price (we’d go for whichever is cheaper at the time of viewing if this describes you).
For gaming; we wouldn’t recommend Samsung in most cases for budget/mid-range offerings, but they do have some mouth-watering expensive gaming displays. Our favorite of which is the Odyssey G9, with its QHD, 1000R Curve, 240hz setup in a super-ultrawide aspect ratio (essentially, 2 16:9 screens in one) and dual DisplayPort output, this is arguably the best gaming monitor on the market for those after next-level immersion.
While not our #1 pick due to its gaps in non-premium gaming, Samsung is a behemoth for a reason.
With the company’s huge capability in producing high-quality LED panels, they are easily one of the best monitor brands for work setups (and gaming if your budget is very high!).
Although we rank ASUS as the best brand for gaming monitors, it was a close race, and just behind them is another Taiwanese powerhouse.
While far from exclusively focussed on gaming, this area is where Acer really shines. With some very compelling options in budget, mid-range, and premium, we often feature Acer for their innovative products, leading the pack for 1440p 144hz ultrawide screens.
We appreciate Acer is also good at balancing offerings with TN, VA, and IPS panels, allowing them to cater to a wide range of user requirements and budgets.
Our best Acer monitor pick is one to rival the ASUS offering above if your budget is just a little tighter.
With a smaller screen size but still boasting a gorgeous quality full HD screen, 1ms response time, and 144hz, the XFA240 bmjdpr contains all the necessities of a gaming monitor (including DisplayPort/HDMI, G-Sync, and more) if you don’t need a 27-inch display at a price that feels like a steal to still get such a quality product from a very reputable brand.
All in all, Acer is one of the best gaming monitor manufacturers in the field today and is easily one of the companies you should focus your searches on when looking for your next immersive setup, whatever the price range.
Don’t be deceived by us not ranking HP as the top/runner-up overall pick, we’ve called these brands the top 7 for a reason!
Californian-based Hewlett-Packard doesn’t have quite the same level of offerings in the mid/high-range, but they have some really fantastic products for a budget office/general use monitor.
Leading that charge is one of the best budget options on the list; the 1D0J9AA.
With the fantastic, sleek build quality you expect from HP hosting a full HD screen with respectable specs; you’re, of course, not going to get the best picture quality at this price range.
But for the budget users? We’re quite floored by how HP has packed such a beautiful offering in this price-tag. Especially considering many larger brands often opt to add what feels like a “tax” to purchase from a reputable manufacturer with decent customer service.
This would be a great option for an office setup (even purchasing multiple units to run a productive multi-screen environment).
On the gaming front, HP’s sub-brand, Omen, doesn’t rule the roost as much as ASUS, Alienware, and Acer, but in certain categories, has some of the best value options.
Our favorite example is in the 1440p 240hz category; whereby the Omen X is one of the cheapest screens in the category, capable of offering a high-end gaming experience at a deceptive low premium price.
While there are some gaps in the mid-range, if you’re looking for a budget monitor that still has a great reputable company behind it, or like the look of some of the high-end value offerings from Omen, know that HP is still without a doubt one of the top PC monitor manufacturers today.
If you’re in the market for a premium display, either for top-quality video/photo editing, gaming, or other professional usages, LG is one of the best choices for you.
With a rich experience in the display market, this South-Korean company seems to really understand the demands of users on the premium end, creating some fantastic screen innovations to match these demands like 4k, top-end color gamuts, and contrast ratios, while still boasting compelling price tags.
Our favorite example of this is the 34WN80C-B. With its stunning WQHD setup (in other words, 1440p ultrawide resolution) hosting an HDR10 compatible IPS panel with a superb color gamut, this screen would be a productivity dream for pretty much any kind of work user. We also cover a cheaper 1080p alternative here.
For gaming, LG has a host of other premium innovations on the market and we consistently feature them in many of our gaming monitor posts.
The most impressive amongst them is the incredibly feature-reach 27GN950-B, which is the highest Hz 4k monitor available today, and easily one of the best in any high-res/refresh rate combo category when considering its other specs, build quality, and price. Despite being aimed at gaming, this would also be a dream for 4k video editing work.
While other PC monitor companies seem to come out on top when considering the best picks for a basic office display or a budget gaming monitor, LG is among the best for really cutting-edge screens.
If you’re after the best money can buy (while still retaining impressive value at higher price-tags) LG is one of the top monitor brands for you.
Last but most definitely not least is a company that has stormed the market in the last decade or so to match many of the largest gaming display manufacturers.
While we give Acer and ASUS the top accolades for gamer monitor brands, we can comfortably say BenQ is on the same level as them and is particularly impressive for those after an esports monitor or someone focusing on fast, reflex-based gameplay (note: Acer/ASUS monitors are great at this too, we’re just talking about in general, for those with a focus on latency above all else).
While the company has plenty of offerings for more immersive titles and even non-gaming, their best capability is when they’re focussed on designing screens for the competitive gaming scene at modest price-points, this will include the highest frame rates, lowest latencies, and lots of quality-of-life features an esports enthusiast will demand to take the edge.
Our pick for the best BenQ monitor is the perfect personification of all of these great traits; the BenQ ZOWIE XL2566K is arguably the best esports monitor at its price range.
At a mid-range budget, the screen manages to pack in a 240hz refresh rate and a visual setup specifically designed to better highlight environmental details (e.g. help the player notice enemy movement ASAP).
On top of that, it boasts great adjustability, a quick-settings change remote, and customizable sideways sliders to avoid distractions in your peripheral; all examples of the great mini-features you often see in BenQ innovations.
For good old-fashioned immersive gaming, this stuff might be overkill.
But for esports players? Having the extra edge in the competition can be what really makes a monitor stand out, which is why we still consider BenQ one of the best gamer monitor brands today.
The next section contains some monitor manufacturers who we may not think of as the same level as the top 7, but are still great and will often have offerings to compete with the above brands in certain specific specs/price-ranges.
Best Budget Gaming Monitor Brand: AOC
AOC is a fantastic gaming display company often capable of producing options that offer comparable value to the top 7 or sometimes offer worthy budget options by sacrificing an optional spec (e.g. a cheap panel type, fast but slightly slower latency).
The AOC C24G1 is a fantastic budget gaming monitor offering 144hz, 1ms, and a 1500R curve all in one affordable package.
Sceptre has really impressed us as of late, with their commitment to often undercutting larger brands with very comparable specs.
Yes, you won’t always have the same exact specs or a large reputable brand behind manufacturing, but if you want a premium experience on a budget, we think this is a great option.
Take the C345W-2560UN as an example, which is an absurdly cheap gaming ultrawide monitor – we would not expect to see one geared for gaming at this price, but they managed it!
A lot of people might be surprised to not see MSI in the top 7.
As great as the company is, we think that their monitor offerings that compete with other brands are limited (and have some history of less impressive customer service).
There is one huge exception though, the Optix MAG27CQ is one of the best gaming monitors on the market, balancing a QHD, curved, 144hz setup in fantastic build quality and price, this single monitor is so good it pretty much puts the company into this category alone!
Great Brand for Video Editing / General Use: Philips
Philips is a great TV brand that needs no introduction.
While we don’t rate them as high in some monitor categories (not competing with the budget office picks or expensive gamer options), they are a really nice player when it comes to high-quality picture specs for production-focused setups or someone after a nice media/general use screen hybrid.
The 346E2CUAE is a superb example, with a gorgeous 1440p ultrawide screen made better by its excellent contrast and color gamut, it represents what Philips is great at: focussing on picture quality above all else.
Lenovo is a company we love for its domination in the laptop market.
But they are also a decent manufacturer of some aesthetically pleasing, well-specced monitor setups for work (no surprise, as work has always been a leading focus of this brand).
Standing at the top of their offerings is the fantastic Lenovo Q24h-10. With QHD, a great picture quality, and one of the most beautiful thin designs we’ve seen in any monitor, this display exemplifies Lenovo as a great choice for someone looking to build a premium work environment.
What if you want to fork out on hardware that is impressive say, in resolution, framerate, and/or latency, but have a very limited budget?
This is Viotek’s specialty, often sacrificing some spec to sell a relatively comparable monitor to its competitors at 10-20% less of the price.
The GNV34DBE is their best offering, which is 15% cheaper than the average curved 1440p 144hz ultrawide gaming monitor and has likely achieved this through its slightly slower 4ms latency.
For some gamers (like those focusing on single-player titles like Cyberpunk 2077/Red Dead Redemption 2), the difference between 1ms and 4ms will be insignificant, so we appreciate Biotek, despite not being a huge brand, still has carved a respectable space for a certain type of user.
Gigabyte, a huge reputable brand in motherboards, GPUs, and laptops, has a few great options in the monitor space (we just don’t rank this company higher due to only having a few options and being a tad more expensive for what you’re getting).
The FI27Q-P is one of the best 1440p monitors for gaming if you have the budget; with up to 165hz, gorgeous colors/contrast, and perhaps the most beautiful monitor design we’ve seen at the price point (with tons of adjustability options).
While we don’t consider these brands part of the top 15, we wanted to include them as there may still be a situation or two where you might be rightly inclined to pick them for your next PC monitor.
Good But Limited: Razer
Everybody knows Razer; a gaming company geared for selling high-spec, beautiful products at a premium.
They only have 1 monitor offering right now, the Razer Raptor, which is why we wouldn’t give them any large accolade.
But the Raptor is a great choice in itself! With stunning picture quality and a beautiful design. You are paying more for the brand and aesthetic, but if it speaks to you, it’s a strong option for a gaming setup.
Nixeus is a little like Viotek; a brand trying to compete with many of the premium offerings on the market.
Our issue is, they tend to be at a similar price to the Top 7 or where not, lacking in stability across their products (e.g. complaints of G-Sync not fixing ghosting in games).
They’re not a bad manufacturer, but we can’t help but ask “why go for Nixeus if Dell, ASUS, Acer, etc. offer something similar?”.
And there you have it! The above are our top choices for the best monitor manufacturers available and we expect in most cases, the monitor you’re looking at should be amongst these companies.
We’ll re-iterate one last time; most of our top picks have tons of choices, this list is about summarising the best average performance of a brand.
For example; even though we cite ASUS as the best gaming display brand, don’t assume that they are the best in every gaming category, it will depend on your individual needs.
So with that said, focus on our top product picks for each brand, or check out our other monitor features here (or below) to find the perfect screen for you!
Kaelum Ross, BSc is the Lead Writer at What in Tech and a leading authority in PC hardware and software. With a career as a senior IT professional, Kaelum has led multi-million dollar projects covering everything from bespoke software development to complex Windows hardware upgrades. Today, Kaelum uses his expertise to serve What in Tech's readers and has been featured in numerous global publications including New York Magazine and Lifewire.
Article has been fact-checked for 2026. All information up-to-date.
The verdict is in, size does matter!
…for PC cases at least. As with all things technology, there are many confusing terms to know.
We’ve got:
E-ATX vs ATX vs mATX vs mITX.
And…
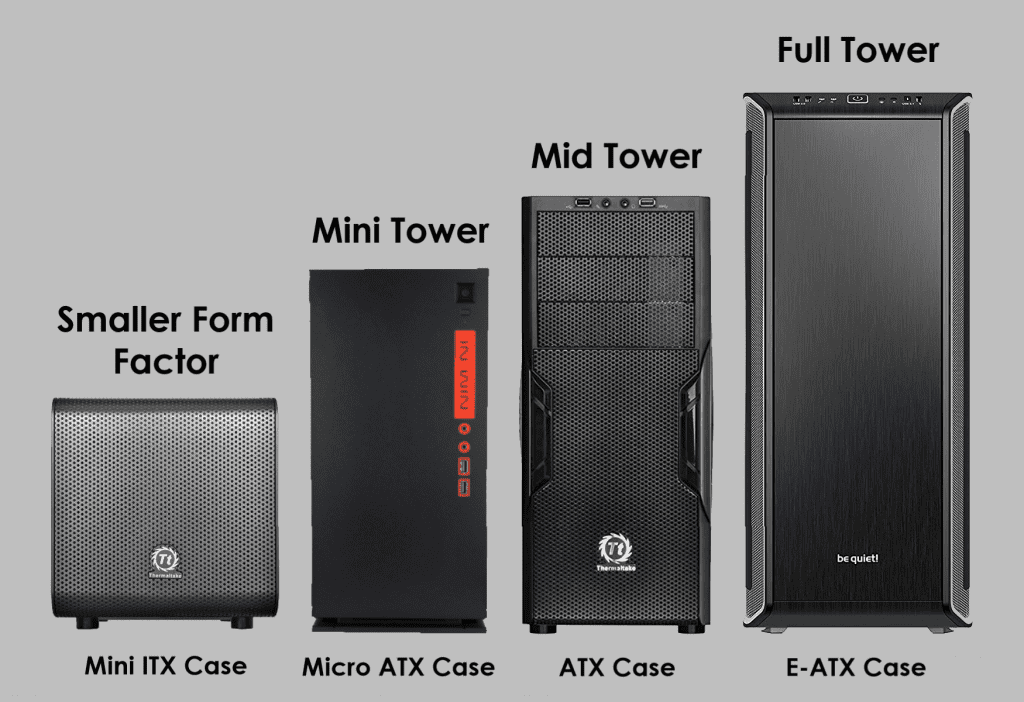
Small form-factor vs mini-tower vs mid-tower vs full tower vs super tower.
I know, I know, they don’t roll off the tongue.
But in this guide, we’ve put together what’s essential.
You’ll have what you need to understand the differences between computer case sizes and decide the right type for your next build.
Table of Contents
Computer Case Size Comparison Chart
Smaller FF
Mini Tower
Mid Tower
Full Tower
Mobo Size
Mini ATX
Micro ATX
Mini ATX
ATX
Micro ATX
Mini ATX
E-ATX
ATX
Micro ATX
Mini ATX
Graphics Cards
1
1-2
2-3
3-4
Case Fans*
1-3
2-5
3-9
6-12
Expansion Slots
2
4
5-8
7-12
2.5" Drive Bays
0-2
0-4
0-8
0-12
3.5" Drive Bays
0-3
2-6
5-8
5-14
5.25" Drive Bays
0-1
0-3
1-4
2-6
*With larger sizes, you will usually be getting more room for bigger fans, not just higher quantities.
PC Case Sizes Explained
Full Tower Size: E-ATX (Extended ATX)
The largest form factor of the popular options, a full tower case gives you the most space for high-end, demanding PC builds that require the best overclocking and plenty of cooling/hardware options.
As you can expect with the large internal dimensions, you’ll also have the best ventilation/airflow capabilities.
If you’re looking to achieve the most powerful build possible (whether for gaming, a server build, or editing/production) then this is the most capable option.
Bear in mind these cases are very bulky, heavy, and on the expensive side.
If you’re looking for something compact or on a budget, check the sizes below.
Note: It’s very rare, but we’ve seen a couple of cases that claim to be “full towers” while still only supporting up to ATX motherboard mounting holes.
The most popular form factor, a mid-tower case strikes a great balance between space/price and is the “jack of all trades” choice.
For a majority of enthusiast builds, a mid-tower case will still have all that you need for a gaming PC (and most other types).
Providing great cooling options for overclocking and enough space for a strong SLI/crossfire build (if desired) with lots more room for the rest of your hardware (ATX motherboards are also the most popular, giving you lots of options and competitive pricing).
ATX is a great middle-ground. Going larger is only needed if you want to build the most monstrous machine possible. Smaller is better for those after something more compact (and often a little cheaper).
Mini Tower Size: mATX / mITX
Mini-tower cases have become very popular in recent years due to the increasing quality of micro ATX motherboards/compatible parts.
The great thing about this form factor is that it offers decent compactness while still providing enough internal space to fit most hardware.
As we get smaller, bear in mind you’ll, of course, have to be more considerate in what parts you’re choosing and the airflow available for them.
But if your gaming build is only 1 (at a push 2) GPUs and you don’t need lots of other drive bays/expansion slots, an mATX case may be the best option for you.
Another bonus add is that mATX cases are usually a little cheaper than ATX due to the reduced material.
Note that some mini-towers only support mITX, so be sure to check that your motherboard and cases are compatible in size before you buy!
Smaller Form Factor Size: mITX
The smallest form factor on the list.
These are ideal for a portable / LAN party case or someone looking for something quite presentable and flashy (e.g. a streaming build).
You can still install many major parts inside an SFF case.
But be aware that for certain hardware (particularly PSUs/GPUs) you will have to get one of the larger mITX cases.
If however, you’re looking for the smallest computer case possible, you’ll have to buy some less common (“specialist”) parts that’ll be a little more expensive.
If your heart is set on a tiny case, don’t let the above cautions put you off. The form factor is becoming popular enough that even niche parts only carry a slight premium over regular ones!
As long as you check your dimensions, you can still create an awesome gaming setup with an ITX case.
How to choose a PC case size
We’ve recommended the best cases for all build types in our detailed feature here (and some picks further below).
But if you want to understand what the criteria are for your desktop case, here’s what to pay attention to:
Hardware support
As per our comparison chart at the start of the feature, larger cases and the big motherboards they support will give you more options for your hardware.
This includes:
Expansion slots – More will allow for multi-GPU builds and other components depending on your needs (dedicated sound cards and network cards).
Note that it’s becoming very common for motherboards to support decent sound, network and Bluetooth capabilities, so many builds will be fine with a case that only has the expansion space for a GPU.
Clearance for main parts – What dimensions are supported for your GPU, PSU, and CPU cooler? These are the 3 parts that usually have to be considered for case sizes.
Drive bays
5.25″ drive bays – Less popular nowadays, but still useful for things like CD/Blu-Ray Drives and additional card readers.
3.5″ drive bays – Suitable for your standard 3.5″HDDs. Having a high allowance here is good for those focused on storage (e.g. video editing builds).
2.5″ drive bays – For your SSDs: having a good amount of these will be good for those focused on speed.
Miscellaneous – Some very large cases will support awesome things like multi CPU/PSU builds and 8 DDR4 RAM slots if you’re interested in power more than a low budget.
Cooling
With big cases, comes big cooling capability.
For air-colling, the larger the tower, the more fans you’ll usually be able to fit in (not just quantity, but size too – often up to 200m).
Larger cases will also include more room for airflow and ventilation which is key for power-hungry builds.
And then there’s water cooling. Whether your focus is on a silent PC build or overclocking, you’re going to have a lot more radiator space in a full/mid-tower. Not to mention how much more pleasant it is to route cooling pipes through a larger case (we’ve had many experiences with tight builds, it can be a pain!).
Nowadays, smaller form factors do have these capabilities, but they’re usually limited in what you can install and more reliant on air cooling.
If you’re serious about buying a water cooling case or pushing your overclocking to the max, go for a larger tower.
Cable management
With larger cases (particularly full/mid) you will commonly see significantly better options for routing your cables into “hidden” areas.
Typically routing behind a compartment underneath the motherboard installation area.
This is not just handy for aesthetics, but also for making the build process a lot easier.
Sure, mATX/mITX will (usually) have the space you need for smaller parts.
But you’ll have to be extra neat/efficient with your cable positioning/tying and ensure you’re not using cables that are overlong (very common!).
If a clean-looking build is extra important to you, you could even purchase a dual-chamber case.
These have dedicated areas to hide not only your cables but your other “less attractive” components (HDDs, PSU, etc).
Size / Design
Now as nice as it is to have great room for parts, cable management, and airflow, the small form factors have a very important thing going for them:
Portability.
You may not really care about this if you plan to have your PC stationary.
But if you’re a LAN party regular and have limited space or plan to use your build in multiple locations (e.g. a VR demo PC) then don’t underestimate the usefulness of this perk.
And then there’s aesthetic.
It should go without saying that cases of all shapes and sizes come in really nice designs.
But it all comes down to personal preference; do you want a monolith towering over your desk or a small compact machine that fits tightly with the rest of your setup?
Price
As far as the case itself goes, smaller form factors will offer the best value due to fewer material requirements.
You can, of course, get PC cases for all form factors in all price ranges, but if we’re talking about value, $ for $, you’re going to get more bang for your buck from small options.
There is a balance here, however.
If you go too small (mainly mITX/SFF cases), you may run into needing “specialist” PSUs/GPUs if the dimensions are low.
These parts tend to be more expensive than their mainstream alternatives.
Because of this, MicroATX tends to be the sweet spot, which leads us nicely into our budget choice…
Which PC case size should you get?
Budget gaming PC case
For a cheap PC build, the best option is usually Micro ATX.
This form factor and motherboard type will have less space and feature availability than ATX/E-ATX.
But you’re not going to care about losing these things in a budget PC (e.g. high PCIe slots and cooling options that would be excessive for a cheap build).
mATX hits the sweet spot between being smaller, but not too small that they lack compatibility with major parts and require “specialist” hardware like many mITX towers.
One of our favorite “all-around” recommendations for a cheap gaming PC case is the Cooler Master Q300L.
It’s popular for a reason; offering impressive utility, build quality, and design for its price range.
We’ll also add that there are also plenty of very affordable budget ATX options if you do want something a little larger/easier to build in.
Mid-range gaming PC Case
If you happen to like the compactness of an mATX, you can still use that form factor for a mid-range PC.
But as we approach a more “typical” gaming build, our recommendation would be to go for a mid / ATX tower.
Even if you don’t necessarily need every hardware allowance a case offers, working with a larger unit provides better airflow/ventilation, cable management, and overall ease of build.
There are a ton of great options out there in this range, but our pick for the best mid-tower case easily goes to Lian-LI Dynamic O-11 and the Fractal Design Define R6. The latter is for you if you are interested in noise reduction.
If you want something a little more flashy, we highly recommend the NZXT H710, but there are so many beautiful cases around if aesthetic is important to you.
Powerful gaming PC Case
What about those less focused on budget, and are instead asking: “how do I build the best gaming PC possible?”.
We don’t want to “gatekeep” the top-end PC builds, you can get a lot done in a standard ATX case (including SLI/decent cooling for overclocking).
But for the best performance possible, you’ll often want to look at full / extended-ATX towers.
This form factor will offer you incredible options for fans, water cooling, multi-GPU, cable management, and much more.
Because they’re focussed on high-end builds, they tend to come with fantastic build quality and awesome designs.
This monolith supports up to 9 fans, 4 water cooling radiators (all of impressive sizes), and plenty of expansion slots/vertical graphics card installation options.
Between this space and cooling utility, you’re going to achieve incredible overclocking potential on a multi-GPU build.
We also feel compelled to include a runner-up pick for those more focussed on style than build in the Thermaltake AH T600.
Take on look at the product and you’ll see why!
Don’t get me wrong, it’s still more than capable of building a very powerful PC, you’re just paying a little more for the aesthetic.
Whether it’s a PC for video editing, server stand-up, some other high-end production build, or of course gaming, the space of a full tower will give you incredible utility.
Small PC / HTPC Case
Finally, there are those after a lightweight PC case.
If your goal is to build something for portability, a home theatre, or simply because you like a tiny aesthetic, then you should definitely be looking at a Mini ITX case.
We would highly recommend checking out our horizontal PC case article which includes a lot of great options.
For its price, the V1 offers great build quality and features considering its limited space, which is why it’s one of the most featured towers on What in Tech.
The best identifier of a case’s internal size compatibility is what type of motherboard a case can support, which should be one of the main factors of your decision.
We’ve included the common “mini/mid/full” form factor definitions in our chart but know that these terms are not as accurate as motherboard compatibility.
For example, you may run into a full tower case which is really more the size of a “large mid-tower”.
There’s also a huge variance in what is considered a “mini-tower”.
This is why a “case with ATX support” is more reliable than a “mid-tower case”, so always check the motherboard compatibility in the product listing.
EATX vs ATX / Full Tower vs Mid Tower
Hopefully, our feature has explained the differences between these two form factors. But as this is a popular question, we thought to provide just a little more context.
ATX/mid towers, while being a tad smaller (typically), will usually have the greatest amount of options given they are the most popular pick on the market.
E-ATX/full towers are larger, more expensive, and will usually give the absolute utmost capability you can get for space and motherboards. It’s just worth being clear that this extra space when comparing E-ATX vs ATX is usually only going to matter for very high-end production builds or enthusiasts who want to max out their cooling and performance as much as possible.
Short answer: ATX is great for a large majority of builds, consider E-ATX if you really want the most power possible and aren’t too concerned about keeping to a budget!
Can my MicroATX motherboard fit in my ATX case (and similar questions)?
Yes.
As per the comparison chart, nearly all cases will fit motherboards smaller than their main form factor.
So you could also fit a Mini-ITX mobo inside an ATX tower, an ATX mobo inside an E-ATX tower, and so on…
That being said, there isn’t really much point in putting a smaller motherboard in a larger case (unless you wanted a large space for airflow and had low build requirements).
In nearly all cases though, you’d be better off getting an ATX case for an ATX motherboard, an mITX case for an mITX motherboard, etc.
Super Tower vs Full Tower PC Case?
“Super Tower” is a bit of a marketing term without a very clear definition of what size it represents (not unlike “XL-ATX”).
Typically, this form factor is going to be on the larger side of a full tower case.
So if you’re looking for the largest computer case possible, then this term is a good sign.
But we wouldn’t recommend excluding full towers in your search, as there are a lot more options available and plenty of these are just as spacious as the super form factor.
We’ve chosen not to include specific “typical” dimensions for each of the form factors in this article because they’re simply too varying from model to model.
We’d highly recommend you look at the dimensions of specific cases you’re interested in, as opposed to relying on “typical” dimensions.
PC Case Sizes Final Thoughts
And there you have it! We’ve been through everything we think you need to know about the wide world of case sizing.
We’ll keep this feature updated if more size-specific details emerge in the market, but generally, you can expect this same advice to be valid for a long time (the PC case market and its practices are pretty stable, even with new offerings coming out).
If you’re still a little overwhelmed by how you should pick, let us leave you with 2 simplifying thoughts:
Focus on what size motherboard your PC case is made for (ATX case, Micro ATX case, etc.) and combine it with an appropriately sized motherboard. The full/super/mid/mini-tower terms are a little vaguer and interwoven, so we recommend just focussing on the motherboard sizing as a better indication for what you need.
Check out our features on the best PC cases available. We’ve reviewed hundreds of PC cases so you don’t have to! Depending on your needs, we have articles on:
Kaelum Ross, BSc is the Lead Writer at What in Tech and a leading authority in PC hardware and software. With a career as a senior IT professional, Kaelum has led multi-million dollar projects covering everything from bespoke software development to complex Windows hardware upgrades. Today, Kaelum uses his expertise to serve What in Tech's readers and has been featured in numerous global publications including New York Magazine and Lifewire.
This feature has been reviewed and fact-checked in April. The information and fan recommendations are up-to-date for 2025.
Ah, cooling, it’s easy to spend hours obsessing over what the best setup is to reduce your PC temperatures just that little bit more.
One of the most important aspects is what arrangement of 120mm & 140mm case fans you install.
But which kind of setup is better?
Today’s feature is here to explain everything you want (and need) to know for 120mm vs 140mm PC fans; comparing noise, performance, size, and price.
We’ll also go over the best case fans for your next build, too!
Table of Contents
Differences Between 120mm & 140mm Fans – Short Answer
We’ll discuss each of the main comparison areas in depth below.
But if you’re after the TLDR; on average, builds based on 140mm fans are superior to 120mm fans.
They tend to perform more quietly in comparable operations, offer slightly better cooling & are cheaper when considering you need to buy less of them to perform.
But, and it’s a big but, it hugely depends on the quality of the fans in question.
A good 120mm fan will be better than a mediocre 140mm fan, etc.
It also depends on the PC case you’re using and what it allows; we wouldn’t say that 140mm fans are so superior that you shouldn’t get a certain type of case if it has more allotment for 120mm cooling.
Unless you’re very focussed on min-maxing cooling, we’d instead advise you to focus more on which PC case you want; which is why we’ve included the best 140mm and 120mm fans throughout this feature.
Overall Best 140mm Fan: Noctua NF-P14
This flagship fan from one of the best brands in the PC cooling business has been through countless iterations.
While we recommend other options below for RGB, premium, silence-focussed, or budget users, the NF-P14 strikes the best sweet spot between decent airflow and a wonderfully low price.
Thankfully, as with most of our top picks on the list, if a brand has made a great 140mm fan, they’ve nearly always come through with a 120mm version that is of the same quality (relatively).
The P12 is no exception; with excellent CFM for the price, it’s a perfect mid-range option.
There are a few miscellaneous factors like bearing type that determine the finer aspects of a fan’s performance, but by far the two most impactful specs (and the ones you should focus on) are RPM and CFM.
CFM, or cubic feet per minute, is the amount of air a fan can move per minute and the most important spec when establishing cooling capability.
Most benchmarks and tests show that the average 140mm fan, with its longer blades, tends to boast a significantly higher CFM rating and can produce better airflow in a case per-fan compared to 120mm offerings.
Things other than mm size can affect the CFM, like blade design, material quality, and most notably RPM.
RPM, or rounds per minute, is how many times a fan can spin per minute.
So for example, if you had two fans identical in every way other than their RPM, the higher RPM fan would be able to produce better CFM.
Generally speaking, 120mm fans often (but not always) have slightly higher RPMs if we’re comparing the same 120mm/140mm models.
This is to ensure they don’t fall too far behind the high airflow/CFMs of 140mm offerings, which can run at lower rounds and achieve the same as a 120mm fan working harder.
So with all that said, we still rate the performance of 140mm fans as the best in most situations, but 120mm can still be a great ally if your desired case focuses on them.
As always, quality matters most.
We’ve seen other resources say 120mm/140mm fans go up to ~1,500 RPM, and this is very far from the truth.
The range is huge; for mainstream choices, fans in either size tend to vary from around 600rpm to 3000rpm, but for some crazier offerings they can go as high as 10,000 (not that you need this, they’d sound like a jet engine too!).
Conclusion: 140mm fans are usually the better choice for airflow if your build allows it. But if not, don’t fret; you can still get great cooling done with 120mm offerings, what’s most important is picking high-quality fans in either size and a chassis that facilitates good airflow.
Static Pressure
While CFM/RPM is where the main difference occurs between 120mm/140mm head-to-heads, we wanted to touch on a spec that is very important for certain placements.
Static pressure is the rating a fan gets which, in simple terms, dictates how much of the airflow/CFM produced will penetrate heatsinks or mesh enclosures.
Providing air through mesh-like barriers is a very different goal to airflow in a clean environment, so different fan types specialize in this area.
There isn’t a clear winner in 120mm vs 140mm for static pressure, so it will really come down to whatever your setup allows you to install (we recommend 140mm if possible due to its CFM advantage, but either is fine).
So if you want decent static pressure fans to cool your CPU heatsink (or a value bundle for mesh casing setups also), the Arctic P12 for 120mm, or P14 for 140mm are the ideal picks at a mid-range budget.
But if you’re interested in our other fan picks below, don’t fret; the choices on this guide all have decent static pressure ratings in comparison to many similar options, and this spec is not as important if you’re not dealing with heatsink/mesh coverage.
Best High-End 140mm Fan: Noctua NF-A14 iPPC-3000
If you’re after the best fan cooling possible, the NF-A14s are one of the best offerings to fit the bill.
With incredible high-quality material/blade designs and up to 3000 RPM mean the A14 have one of the best CFMs on the market.
It’s worth noting these things can get loud at the highest RPM (which you’ll only hear during intensive operation), but if you’re after the best airflow, they’re fit for the job.
The NF-A14s (and F-12s) also have excellent static pressure, and are a perfect choice if you’re looking for heatsink/mesh cooling.
The smaller brother of the NF-A14 is a fantastic choice for setting up 120mm fan cooling.
Achieving similar top-range CFM and RPMs with their superb materials (relative to other 120mm fans) these products are one of the best PC case fans for gaming, overclocking, and other high-end usages.
Although the differences on the cooling/airflow front are notable, we think the real reason to prefer 140mm fans (if possible) is their quieter operation.
We’ll repeat the same disclaimer; this is on average. A low noise-focussed 120mm fan will be quieter than a standard 140mm offering (and would still be a decent solution for a quiet build).
But if we’re talking about how to achieve the quietest fan setup, we definitely prefer 140mm-focussed setups.
The reason is relatively straightforward; as per our airflow section, 120mm fans have to spin at slightly faster RPMs to achieve similar cooling to 140mm fans.
Now while other factors do matter in decibel production, if you put two similar fans head-to-head, the RPM they work at will be the largest indicator of which makes more noise.
You may think the blade fan size must matter too, but have you ever thought about how a ceiling fan in a house can be nearly inaudible, but a tiny desk fan can get loud very quickly? It’s primarily to do with the ceiling fan having to spin way less to cool its environment.
In other words; because 140mm fans have to spin less fast to achieve suitable thermal control, they produce notably less noise on average than 120mm fans.
This has been demonstrated in numerous benchmarks and tests.
If you’re looking at a quiet PC but only have 120mm fan availability in certain parts, don’t worry; the recommended quiet 120mm fan pick below still achieves very low DB(a) cooling.
PWM vs DC Fans
While not strictly related to the 120mm/140mm battle, if you’re interested in noise, it’s worth briefly touching on this spec as you’re bound to see it in comparing quiet fans.
DC (direct current) fans are controlled by 3-pin headers on your motherboard, while PWM (pulse width modulation) adds an additional pin that allows the motor and voltage requirements of the fan to signal each other more effectively than DC units.
Both types of fans require a minimum RPM to operate (too low and they begin to stall, act erratically, etc.) and due to the PWM’s improved signaling, fans with this functionality can achieve lower RPMs (either by the user’s control or automatically during less-intense operation).
So for something focussed on quiet operation, it’s a good little bonus to have a PWM fan (if your motherboard has 4-pin headers, which many modern ones do).
(Don’t fret too much about this though, you can connect a 3-pin fan to a 4-pin header and vice versa, you just won’t get PWM functionality from a 3-pin header or fan).
Though to be clear; a good DC fan still goes to fairly low RPMs that we expect will satisfy even those users focused on a silent build (providing they’re using a decent enough case).
Go for PWM fans if you have 4-pin headers by all means, but only consider this a nice-to-have, and not a super important factor of a quiet machine.
Best Quiet 140mm Fan: Be Quiet! BL040
Be Quiet!, as you might expect from the name, is one of the leading brands in silent PC cases, and their work in fans is just as impressive.
The BL040 is fantastic at keeping its great CFM/airflow to a very low-decibel standard; if used with a decent quiet computer case, you’ll have the best chance at a nearly silent PC setup.
The BL40’s smaller brother is a fantastic product for 120mm fan builds too.
It outputs a slightly higher decibel rating per fan than the 140mm version, but this is a difference of only 0.4 Db(a) at maximum speed. The BL039 is still very quiet when compared to nearly every other 120mm fan on the market.
Sometimes, comparing the differences between 120mm and 140mm PC fans is apples and oranges, because it really depends on the computer case’s compatibility.
The average 120mm fan dimensions are 120mm x 120mm x 25mm
The average 140mm fan dimensions are 140mm x 140mm x 25mm
In other words, although these can vary in thickness, 140mm are always notably larger, and most PC cases can accommodate fewer 140mm fans than 120mm ones.
We’ll reiterate one of our main points through the feature: it’s better to focus on getting a high-quality PC case for your needs. That could be anything from the best all-round, the largest, the cheapest, or the quietest, whether it accommodates 120mm setups or 140mm setups better is a secondary point.
But if you have the luxury of choosing between them, you will often be comparing larger amounts of 120mm fans and how they can perform versus less 140mm fans. The most common battle is 3 120mm vs 2 140mm.
3 120mm Fans vs 2 140mm Fans
For cooling, 3 120mm fans tend to have slightly better CFM /air output than 2 140mm fan builds.
But this isn’t the whole picture for a majority of cases.
Look at this picture of a relatively standard PC case boasting 3 120mm fans on its front.
The front is the most common place where you are choosing 3 120mm vs 2 140mm, notice how the lowest 120mm fan is mostly level with the PSU/HDD shroud.
Having a fan that is almost directly providing airflow to your PSU is not really very helpful.
Now take the red squares as an example of how the placements would look if you were instead using 2 x 140mm fans, and the arrows as the highest and lowest points the air is directed at.
Yes, the CFM might technically be slightly lower, but the airflow you are getting from the 140mm fans is better directed at your hardware that needs it (i.e. GPU & CPU).
Therefore if you have a chassis with a PSU shroud at the bottom of the case, the 2 x 140mm fan setup is better for cooling.
If you have a PC case with no shroud like the Lian-Li PC-011 Dynamic, then it’s very close to 50-50, but we would say 120mm fans come out on top for their slightly superior CFM (2 high-quality 140mm fans would still serve you well).
For noise reduction, 140mm fans still tend to come out as the best choice, with their narrow second-best CFM coming largely from lower RPMs. If silence is your focus, stick to the quiet 140mm fan picks above.
120mm vs 140mm Price / Value
It’s all good saying which fan size is quieter, better at cooling, etc.
But what is the best bang for your buck? Is the average improvement of 140mm worth a price difference?
Generally speaking, 140mm fans are slightly more expensive than their 120mm counterparts.
This isn’t a big increase though; the average price difference is less than 10%, and as far as we’re concerned, the superior CFM and noise reduction is well worth the modest price increase.
Also, as alluded to in the last section, you usually need to buy fewer 140mm fans to perform a comparable job to high-quantity 120mm setups.
Remember that you get what you pay for with either fan type; the budget fans below can serve most build well, but if you’re after the highest performance, see our premium picks directly after.
Conclusion: 140mm may be slightly more expensive, but it’s a modest increase for better performance/lower noise, and you usually need to buy less to achieve the same cooling which will mean many 140mm fan builds will work out cheaper!
Best Budget 140mm Fan: uphere BK143-3 pack
At an incredibly low price point, the uphere triple packs still manage to provide decent cooling for a budget build.
We would prefer users after the best PC fans for gaming or overclocking to go for our other picks on the list, but if you can’t stretch your budget very far, the BK143 are without a doubt the most impressive ultra-cheap fan options on the market.
The 120mm version of the BK143 fans are even cheaper, it’s worth noting you won’t get the same level of cooling as the 140mm fans (with their longer blades resulting in better CFM).
But if your case is equipped for 120mm fans and you’re on a budget, the 12BK3 are unmatched in the cheapest 120mm fan category.
While there is no notable difference between 120mm and 140mm fans in the RGB category, we appreciate all of our picks so far are geared towards non-lit fans.
Cooler Master’s flagship RGB fan was the 120mm -sized MF120 for many years, and one of the most popular fans on the market.
But we’re pleased to see that they’ve created a 140mm offering that is just as beautiful, with its ARGB lighting illuminating the outer halo and inner fans, the MF140 doesn’t just look stunning in motion, but also boasts great performance/CFM for a powerful build.
The MF120 is the classic option in Cooler Master’s RGB series and a long-standing perfect choice for those after the best ARGB fans on the market; balancing a great customizable aesthetic with impressive CFM, we recommend either the MF120 or the MF140 for anyone with the available RGB headers on their motherboard.
Performance: 140mm usually offers superior airflow/CFM, with the exception of more 120mm fans in open cases with no PSU shrouds (still a very close race).
Noise: 140mm is the clear winner, having to spin lower to achieve the same performance as a 120mm counterpart.
Value: 140mm fans are slightly more expensive but their performance is worth the increase. You usually have to buy less of them to perform the same job, which means overall, you will likely save on a 140mm fan build.
Conclusion: In a majority of cases, we give the edge to 140mm fan setups.
However, with that said, we’ll wrap up the piece by saying our main point one last time; the quality of the fan is more important than the size, whether 120mm or 140mm, stick to our to picks above or other high-quality offerings, and you’ll be well set for a well-cooled build whatever the size!
Kaelum Ross, BSc is the Lead Writer at What in Tech and a leading authority in PC hardware and software. With a career as a senior IT professional, Kaelum has led multi-million dollar projects covering everything from bespoke software development to complex Windows hardware upgrades. Today, Kaelum uses his expertise to serve What in Tech's readers and has been featured in numerous global publications including New York Magazine and Lifewire.
Ah, the central processing unit; this integral part is at the heart of any PC build.
Despite that, it can be deceptively hard to learn about what makes a CPU good and which one you should buy for your next build.
That’s why today’s feature is here to guide you through
The makings of a CPU
What elements to focus on depending on your needs (e.g. gaming, production)
Some FAQs (i3 vs i5, dual-core vs quad-core, etc.)
We’ve also included our top recommendations if you’re just after the best CPU for your budget/requirements without being bogged down by the details!
Table of Contents
What makes a CPU good?
The easiest way to answer this question is to break-down the main parts that make up a CPU.
Clock Speed
If you’ve seen processors advertised before, you’ll be familiar with seeing clock speeds (or the clock rate) in GHz.
What this indicates is how many times per second your CPU can perform tasks. So, if your processor has a speed of 3GHz (3,000,000,000 hertz), it can perform up to 3 billion cycles a second (more is better).
Base Clock vs Max Clock (or Boost Clock)
Most Ryzen/Intel CPUs today record their clock rate with multiple figures, usually “base speed” and “max speed”/”up to”.
Essentially, CPUs today are intelligently built to only use the clock speed that is required for the tasks at hand in order to conserve power.
If you have an expensive processor and are just running Netflix, there’s no reason for the hardware to heat up and run at max capacity!
The base clock, as the name suggests, is what your CPU runs at when idling/during low intensity.
The max clock is how much individual CPU cores can climb up to in power when performing intensive tasks (e.g. gaming, rendering).
Both are important, and a higher value for either means a faster system in different circumstances (in most cases, the 2 values increase at a similar rate to each other with more expensive CPUs).
Cores
The other term you’re probably already familiar with when seeing CPUs on Amazon; a core is an integral part of buying a processor today.
Essentially, each core is its own individual processor within your CPU.
So, for example, a quad-core CPU is essentially 4 CPUs in one, each capable of performing its own tasks.
Most processors today are between 4 and 8 cores, but the full range is anything from 1 to 128.
Sounds pretty awesome right? Well, for the most part, it is!
But there is an important point to make, using quad-core as an example: 4 x the cores does not mean 4 x the power in individual processes.
In simplistic terms, having 4 cores means you can perform 4 independent operations as fast as 1 core can perform 1 operation.
If you’re trying to get 4 cores to target the same task (e.g. playing a game), then the clock speeds, IPC, and other aspects of how your CPU works for a single core will be integral too.
That’s not to say having more cores doesn’t help individual processes, many applications (including games, as we’ll discuss further below) are developed with multi-core use in mind and can utilize some of their power.
Cores are important, and the days of single-core are over (with dual-core also on its way out), but we’re just trying to stress that there is no reason to go too crazy with cores. We expect 99% of readers would see close to 0 benefits from more than 16 cores, and many will see diminishing returns past 4-8 (we break this down for each PC type further below).
Threads
Multithreading is a technology that is used by Ryzen (SMT or simultaneous multithreaded) and Intel (hyperthreading) to allocate multiple “virtual cores” (i.e. threads) inside each core.
In simple terms, this allows cores to split up certain types of workload (e.g. when 1 thread is waiting on information to complete a task, the second thread can be busy doing “prep work” for that task).
They both share the same physical specs of the core, so real-world performance gains are usually only marginal from your thread count.
There’s good news for learners too: nearlyevery mainstream CPU today has 2 threads per core.Therefore there’s no significant need to focus on thread count when you’re already considering cores.
IPC
The IPC is best described as the “hidden ingredient” for what makes a CPU good, as it is often not as discussed as the more marketable specs above and below.
Despite that, it’s very important in establishing speed; IPC stands for instructions per cycle/clock.
As you might expect from the name, IPC indicates how many tasks/instructions your CPU can perform for each cycle.
This is an underutilized spec as you could have a CPU with a very high clock speed, but if its IPC is low, it will be slower than a low-clock speed CPU with notably higher IPC.
IPC is often indicated or tested in CPU reviews/benchmarks as opposed to product listings.
The good news/rule of thumb is that newer generation processors from Ryzen and Intel will provide better IPCs than their predecessors, so although this spec is integral, you don’t have to overthink it too hard.
TDP
Thermal design profile (or TDP) is how much power your CPU demands in watts (e.g. 65W).
If just one TDP figure is provided, this is nearly always the max wattage required by your CPU (under heavy loads). Sometimes listings also include the idle/base TDPs, which refer to how much power is drawn at calmer usage.
In terms of performance, TDP does not directly affect your CPU (yes, higher TDP tends to mean a more powerful processor, but this isn’t a great metric, focus on the specs above).
Instead, what TDP is good for is understanding what level of CPU cooling you need and the PSU requirements of your CPU.
It’s also the best indication of how much you can expect your CPU to increase your energy bill (higher = more) but the difference between a modest and high TDP usually won’t mean more than $5-$20 per year.
Cache
Processor cache is the onboard caching system on a CPU that is used to interact with your RAM and access frequently used information from it as required.
The cache is important, but the values between modern CPUs are going to be very similar, and any differences are going to have immense diminishing returns in real-world performance compared to clock speed, core count and IPC. We included this for completeness but would recommend most users to not worry about this spec in their buying decision.
Integrated Graphics
Depending on the model of CPU you’re purchasing, you may have a processor designed to also do the job of a GPU included.
This is more useful if you are building a very budget/basic general use PC or a smaller computer with less graphical requirements to avoid the spatial needs of a graphics card (a common example is building a home theatre PC in a horizontal case).
If you’re building a mid-range desktop or something for gaming, you’ll definitely want a graphics card over integrated graphics; an independent GPU provides much more power (having the integrated functionality may still be useful to have as a backup if your GPU has issues and you need to troubleshoot, but isn’t essential if you’re on a budget).
The same logic goes for laptops, many have integrated GPUs to save on space; this is fine if you are a general user, but you’ll want a laptop with a GPU for gaming, video editing, or longevity.
Which CPU specs are the most important?
We’ve included all the main parts for completeness, but the short answer is how good a CPU is for most users is mostly determined by a mixture of its clock speed, IPC, and core count.
If you’re confused, a great rule of thumb to follow is that the latest generation of Intel and Ryzen processors will be the best “bang for your buck” at each of their respective price ranges and contain the latest innovations in clock speed, IPC, and core counts (we’ve provided some of the best options below).
How to choose the right CPU for your needs
The utility of a CPU usually overlaps into multiple areas (i.e. a processor good for gaming will be good for general use and media).
The question on how to chose is really around how much power you need.
If you do high-end development (rendering, intensive video editing, etc.) you’ll need a more powerful CPU than the average gamer.
This section is about providing a guideline depending on your individual requirements.
Choosing a CPU for Gaming
How many cores do you need for gaming?
4 is the absolute minimum today, as many developers have begun to use multi-core technology in the fundamentals of their game engines. If you’re using a single/dual-core, you’ll likely not meet the minimum specs for many titles.
While 4/quad core is the minimum, we’re now past the days where it’s recommended. We’ve noticed other resources saying “4 cores are all you need” – but this is an outdated statement.
Many PC gaming benchmarks have tested the average FPS of new popular titles at 1080p, 1440p, and 4k and it’s clear there can be a significant difference between 4 and 6 cores, a notable increase from 6 to 8, and a lesser-but-fair improvement from 8 to 10/12 (above this amount is when diminishing returns really settle in).
Now, benchmarks are examples, and of course don’t reflect your exact setup (GPU, motherboard, cooling, graphics settings, etc.). Additionally, each game has different CPU requirements (with simulation/larger-scale games usually benefitting more from increased processor power).
But the differences noted in various benchmarks demonstrate that the average user is likely to see real-world improvement above 4 cores.
Bear in mind all this advice is about shopping with the latest generation of Intel/Ryzen CPUs (10th gen and 5000 series); a previous-gen 8 core CPU may run slower than a current-gen 6 core CPU.
It’s also worth bearing in mind that the latest generation consoles (PS5 and Xbox One X) are built with 8 core/16 thread CPUs. This doesn’t mean that you need this for gaming, but there will likely be some advantage to having a similar architecture in your gaming PC once developers begin to focus on this layout with major cross-platform titles.
With all that said, a good rule of thumb for gaming core requirement is:
4 cores at a bare minimum
6 cores as a good standard for budget/lower mid-range
8 cores for the optimal sweet-spot/mid-range and to match the new console gen standards
We see this question asked a fair bit, but as mentioned in the first section: nearly all mainstream CPUs (especially those focused on gaming) have 2 threads per cores, with the latter half being a more important overall indicator.
In other words, don’t focus on threads, focus on cores.
What other CPU specs are important for gaming?
Clock speed and IPC are also very important, but it’s harder to break these down in the same way as threads/cores (as they vary notably between choices).
The easiest suggestion is to focus on the latest generation CPUs which will be tailored for the optimum clock speeds/IPCs at each price-range (we list the best for different budget types just below).
Ryzen vs Intel for gaming
No CPU discussion would be complete without a word on Intel vs AMD processors for gaming!
It’s a very close race for the most part.
AMD tends to have a focus on increased core/thread count, while Intel’s focus is on achieving the highest single-core clock speed.
For gaming, single-core clock speed is very important, and typically you’d expect Intel’s approach to win out here.
However, AMD sometimes offers better prices for similar performance and as we’ve seen from benchmarks, core/thread count does also play a notable role in avoiding bottlenecking a GPU’s performance.
We would say it’s usually common for AMD to come out on top, but right now, it’s really too close to call for gaming. As you’ll see in our recommendations below, we choose CPUs from both vendors and the best value is really going to depend on the state of the market at any given time (ignore CPU brand loyalty, it’s a waste of time!).
Best CPU for Gaming (Mid-Range): Intel Core i7-10700K
It’s a very close race for the best gaming CPU between the 10700k and AMD’s new 5800X.
The 5800X usually averages 2-3% FPS improvement in gaming benchmarks but comes at a near 20% increased cost (and is short in stock) therefore we give the crown to the 10700k.
This beastly Intel processor hits the sweet spot with 8 cores/16 threads to match new console architecture, and with fantastic clock speeds/IPC, it’s one of the best CPUs for RTX 3070 & 3080 builders.
For those after a high-end gaming desktop CPU, we give this accolade to the fantastic new 5900X.
With an impressive 12 cores & 24 threads alongside immense clock speeds, the combinations on offer here is what we consider the maximum you need in a CPU today for gaming (anything more is where you start to see notable diminishing returns), with the right GPU you’ll be able to throw pretty much any game at this CPU and get a great result in 1440p or 4k.
You don’t just have one of the best CPUs for RTX 3090 builds (and other premium gaming machines) but also a CPU capable of working alongside other high-end parts for intensive production work (be it development, rendering, or high-scale video editing).
After the best high-end Intel gaming CPU? Your best option will be the i9-10900K.
For cheaper builds, the new budget offering in AMD’s Ryzen 5000 series is a fantastic choice.
The 5600X still hits 6 cores / 12 threads with the excellent clock speeds and IPC you expect from the latest generation of gaming processors.
What’s more, unlike the other 5000-series CPUs, the 5600X comes bundled with AMD’s Wraith Cooler, which is a pretty decent option as far as stock coolers go (especially for a budget build).
We would say, however, that if you could stretch that little bit further and get our top i7-10700K choice (or the Ryzen 7 4800X), we think that is the best value for money in the gaming space today.
But rest assured; if not, this is still a great processor and would work well alongside an RTX 2000 series GPU or even the RTX 3060 when released.
If you’re looking for something even cheaper while still hitting our recommend 6 cores for a budget build, the Core i5-10600K is your best bet.
If you’re looking to stream on Twitch or another platform, you can usually expect a couple of cores to be pre-occupied with the streaming tasks.
So as a rule of thumb; follow our gaming core requirements above and +2 for streaming (6 minimum, 8 budget, 10/12 mid-range, and more for premium).
Best CPU for Streaming: AMD Ryzen 9 5900X
With AMD’s focus on cores, you not only have a great CPU for gaming here but something that has enough spatial capacity to handle even demanding streaming requirements.
If you’re after an option that’s cheaper, Intel, or more readily in stock right now, the i9-10900K is a good second place.
If you’re after a non-gaming CPU and your tasks aren’t much more than internet browsing, Netflix, and business applications (Word, PowerPoint, etc.) or an HTPC/media build, then you can get away with a significantly cheaper processor.
We never recommend too cheap of course, even decent budget CPUs today with the latest motherboard sockets still offer decent core/thread counts to make sure you have a relatively smooth experience, you can just afford to lose the high clock speeds/IPC offered by the more expensive options.
Note: by general use, we do not mean more hefty production tasks like video editing or development work (those are discussed below).
Best CPU for General Use: Intel Core i5-10400
At a fantastic low price-point, the 10400 has enough juice to run a smooth budget non-gaming build.
One of the really nice things about this processor is the integrated Intel UHD 630 graphics, which have enough capability to act as a GPU solution for a basic build (and can reportedly run/stream 4k video, so could be a great option for a budget HTPC).
Although people think that a GPU is the be-all-end-all for video editing, most popular software, including Adobe Premiere, Final Cut Pro & Sony Vegas, are all designed to make good use of high core/thread counts.
Therefore, you benefit significantly from the newest generations of CPUs with their excellent core/thread provisions (the same advice goes for other medium intensity software requirements like mid-range animation or development work).
So how many cores for video editing are recommended? We would advise at least six, but more will improve your experience notably too.
Best CPU for Video Editing: Ryzen 9 5900X
It’s another win for the fantastic 5900X, its 12-core 24-thread capability simply provides so much performance potential for a video editing desktop (including 4k/8k).
Do you need to spend this much on a video editing CPU? Of course not, you could still manage edits on a lesser CPU (like the 5600X from our budget gaming picks) but if you’re serious about a productive rig, this is an ideal choice.
The i9-10900K is your best choice for something mid-range or for those after Intel and is still a great choice with its 10 core/20 thread setup.
To be clear; an overwhelming majority of users do not need a high-end desktop CPU (HEDT).
HEDT CPUs are specifically designed for very high-end production work; think industry-standard rendering, server builds, and other intensive requirements.
That said, if any of these sound like you, there is a select set of CPUs designed for some incredible levels of computation going up to 64 cores/128 threads while still retaining great clock speeds and enormous caches.
Best HEDT CPU: AMD Ryzen Threadripper 3990X
Arguably the most powerful CPU on the market today, the 3990X includes an immense 64 cores and 128 threadswhile still retaining other decent specs.
Of course, its single-core clock speeds are not as high, but this isn’t a chip for gaming, it’s about large-scale production work; its productivity potential will be pretty much unmatched by any mainstream CPU line.
Bear in mind that the Threadripper series runs on the TRX40 chipset and requires a different motherboard type to many mainstream choices, we have a recommendation on a good option in our EATX motherboards feature.
Needing a budget HEDT CPU? The best we’d recommend is the brand new Ryzen 9 5950X which is still a productivity machine (with less diminishing returns).
We’ve aimed to cover a large majority of build types in the picks above, but appreciate some of you may have very refined requirements.
We’d reiterate an earlier point made: if you’re focussing on the latest generation of Intel and Ryzen chips (10th gen and 5000 series) then you’ll be in a good spot to get the best value for whatever budget you have.
The processors this gen are also fairly well balanced between various spec types, so you can take our above gaming/production picks as a template, and we’d expect they would apply to most other purpose you’re looking for (as a rule of thumb).
CPU FAQs & Head-to-Heads
There are not many things more common in the CPU space than people asking questions like:
What’s the difference between dual-core and quad-core?
or:
What’s better, a core i3 or core i5?
And we’re not surprised! The processor industry doesn’t always do a great job of making what actually makes a CPU good clear.
The answers to these questions aren’t always clear-cut, but we’re going to give you the best summation for someone after the essential knowledge when buying a CPU.
Note: don’t feel inclined to read through all of the FAQs to learn about CPUs; our key knowledge/recommendations are above. These are specifically here for those of you who want a little more clarity on certain areas.
Intel Core i3 vs i5 vs i7 vs i9 CPUs
This i naming structure is how Intel allows users to have a quick reference point to compare CPUs in the same generation depending on their needs as follows:
i3 CPUs are the cheapest/budget options (still fairly powerful with the current 10th gen CPUs)
i5 CPUs are budget/low mid-range options
i7 CPUs are the higher mid-range choices
i9 CPUs are for enthusiasts and professionals (i.e. maximizing your productivity or gaming capability, with some diminishing returns for the latter).
These aren’t definitions set in stone, but usually how the I-series go and is a good guideline for you to make sense of all the different offerings (i.e. the higher the number, the better the processor usually is).
There are other non-i processors (like the Pentium series) but in today’s market, for anyone reading this list (providing you have the budget) it’s good to stick to at least i3 for a somewhat smooth experience.
It’s key to remember that these comparisons only make sense for Intel CPUs in the same generation.
For example, an i5 9400F (9th gen) will provide about the same performance as an i3-10100 (10th gen). This is because the 10100 comes from the next generation which is created using more efficient practices than the 9th gen.
Any resource that says i3 “has X cores or Y clock speed” is false. i3 (or any of the i CPUs) have lots of different meanings depending on the generation, only use these terms as a guideline!
Ryzen 3 vs 5 vs 7 vs 9 CPUs
Very similarly to the Intel naming standard, AMD uses these terms as a guideline naming convention in place to allow you to compare same generation CPUs with some ease:
Ryzen 3 CPUs are the lower end choices (still capable for general use)
Ryzen 5 CPUs are budget/ lower mid-range choices
Ryzen 7 CPUs are the mid-range choices on the premium-side
Ryzen 9 CPUs are the enthusiast options
It’s worth noting that we don’t know if there will be a Ryzen 3 5000 CPU as of yet, AMD has only announced Ryzen 5, 7 & 9 5000 series CPUs.
Remember, the terms only work for comparison if the Ryzen CPUs are from the same series.
Intel vs Ryzen CPUs (Non-Gaming)
We touched on Intel vs Ryzen early, specifically for gaming, where the winner isn’t too decisive.
Now, what about other areas like general use, business productivity, and production (mid-range or high end)?
Well, both companies do still have great options.
However, with non-gaming software, it is a lot more common to see more beneficial use from multi-core/thread performance that AMD specializes in (as opposed to Intel’s single-core performance gains).
So generally speaking, AMD comes out on top for providing the best value for non-gaming desktops.
But this is not universal, which is why we highly recommend sticking to our recommended CPU picks above, where both brands are offered for different requirements.
Core head-to-heads
We see many users asking questions about values of specific core quantities and how they compare to others, so we’ve put together a quick-fire reference for some of the most common “battles”.
These head-to-heads are for a rule of thumb only because in reality, for example, a 4 core and 8 core will nearly always have different clock speeds, IPCs, etc. These examples are based on the assumption that all the other specs of the CPUs are identical (other than threads, which we are assuming will be 2 x the core quantity).
Dual-Core vs Quad-Core / 2 Cores vs 4 Cores
While Quad-core processors are becoming less used, dual-core is, in a larger way, on its way out as a valid option for modern desktops.
One of the only CPUs we would consider a valid option for very basic workstations is AMD’s Athlon 3000G (which is nicely on the modern AM4 motherboard socket, but was released in 2019, so is still becoming dated).
Sure, you could build a basic general use PC with dual-core. But for only a tad extra, a quad-core CPU like the i3-9100 will offer significantly more value with its slightly higher price tag. Quad-core is definitely the better choice for even a basic workstation (even 6 core if you can stretch to it, as we detail below).
For gaming, we would pretty much not consider dual-core a valid option as quad-core is the bare minimum for a gaming PC nowadays due to the number of games that require 4 cores / 8 threads as a minimum. Bear in mind that 4 cores are still a tad low for games too (though perfectly doable if you are on a very tight budget).
Dual-Core vs Six-Core / 2 Cores vs 6 Cores
The difference between dual-core and six-core is very significant in modern-day computing. The key change is that 6 cores are way more of a leading market force with more supply/options, so you’ll nearly always be getting way better value with a 6 core processor (even if its price-tag is higher).
Yes, some will argue you can still get away with dual-core for a very basic workstation and we don’t disagree. But our counter would be why not invest a little more for a CPU that will be dramatically more future-proofed for building a long-lasting machine (even for basic use)?
This is why our top general-use/budget recommendation above is the 6-core i5-10400, which still comes on the new LGA 1200 socket and has integrated graphics for a ridiculously low price-tag.
For gaming, this question is a no-brainer; 2 cores is not good enough for modern gaming, 6-8 cores is the sweet spot, with six being perfect for those a little more budget-conscious as we point out in our recommendations above.
Dual-Core vs Octa-Core / 2 Cores vs 8 Cores
At this point, the battle between 2 and 8 cores barely feels fair; with most 8-core options today being premium choices that pack serious power for productivity workstations.
We will say that 8-cores may begin to be the point where your CPU may be overkill if you’re just building a web browsing, media, and/or basic work software computer (where you can get away with a quad-core like the i3-9100 as a budget choice or the 6-core i5-10400 as our recommendation).
If you’re after a machine for productivity, video editing, or mid-range production however, 2 cores is not a good option for you, and 8-core CPUs like the 5800X will provide fantastic utility for more intensive software.
For gaming, 2 cores are below our minimum recommendation of 4 cores; an 8 core processor is what we consider to be on the high-end of the sweet spot of FPS performance gains for most gaming titles (i.e. perfect for mid-range gaming desktops looking for the most value before diminishing returns kick in).
Quad-Core vs Hexa-Core / 4 Cores vs 6 Cores
An argument can be made both ways for a general use PC, but we think the value and longevity a 6-core will provide is the better option for a larger majority of desktop builders even if your needs are simple.
This is largely because modern generations of CPUs are moving to 6-core as one of their standards, so the available options tend to offer better value per dollar.
This is, of course, a rule of thumb only; but taking examples of two of the best value processors for budget builds, the i3-10100 vs the i5 10400.Both of these processors are perfectly suited for a cheap PC, and if your budget is really tight, we can happily recommend the 10100 as a valid option. The reason we focus more on the 10400 as the best budget CPU is because we think that for its modest price increase, having the extra 2 cores will provide you with better longevity that is worth the small price jump.
For gaming, we’d recommend a 6 core processor with better clock speeds like the 4600X if possible. You absolutely can get away with a quad-core CPU if needed, but 6 cores will be better suited to match what games will likely move to in the future as they continue to focus on multi-core/threading optimization.
On a gaming note, while in a perfect world you will have a decent spec GPU and CPU, if your budget is very tight, it will usually be more beneficial to sacrifice CPU specs over investing in a better graphics card.
Quad-Core vs Octa-Core / 4 Cores vs 8 Cores
For a general use PC, we’d definitely recommend four cores over 8 cores, the latter being overkill even for somebody focussed on providing some longevity.
For productivity/production/video editing, 8 cores will usually provide a notable benefit over a 4-core setup.
For gaming, 4-cores is our minimum recommendation, and 8-cores is on the higher mid-range side of the gaming “sweet-spot”, so while we would of course recommend Octa-core processors if possible, it really comes down to if you have the budget as there is certainly a stark difference in cost between the two.
Hexa-Core vs Octa-Core / 6 Cores vs 8 Cores
General workstations with basic internet/software/media needs will usually be fine with the modern 6-core options.
For productivity users, it really depends on how demanding your needs are; there are certainly plenty of 6-core processors that can handle things like 4k video editing, significant compiling, etc. but 8-core options, especially something like the 5800X, will certainly provide you a worthy boost if you can stretch further.
For gaming, 6-8 cores is what we consider the “sweet-spot” for modern-day gaming CPUs; with 6 being on the lower budget side, and 8 being for mid-range users who can fork out for something extra performative.
6 cores would be sensible for someone who needs to invest more in their GPU and there is no shame in settling for something like a Ryzen 5 5600X.
That said; one big reason it would be great to push your build to an 8 core/16 thread CPU if possible as you are then working with a gaming PC that has the same core/thread specs as the new PS5/Xbox Series X. This might not mean much for a little while, but over the console generation, developers will likely start utilizing this architecture layout. Having a CPU that shares these qualities isn’t necessary but will likely open up some better optimization for you on AAA titles made with consoles in mind.
It’s really a close call for gaming, and purely comes down to your budget; we think you’ll be satisfied with the value both options provide.
Hexa-Core vs Deca-Core / 6 Cores vs 10 Cores
Now that our head-to-heads are looking at 10 cores and beyond, we’re really getting into the power-users who are either running intensive workstations or want the absoloute best quality even with diminishing returns.
If you are running demanding production applications with high requirements in rendering, compiling, etc., you will find some value in 10+ core options, but 6 core processor with good specs elsewhere will be more than fine for a budget/mid-range production machine.
For gaming, 10+ cores is where the diminishing returns really settle in. Yes, there will be improvements over 6-core, but most of these will be shared by 8-core processors, so we’d only recommend 10+ for high-end streaming or those who want the absolute best quality regardless of price.
Octa-Core vs Deca-Core / 8 Cores vs 10 Cores
For users with very intensive production requirements, you can expect to see some improvement during your most demanding processes between 8 and 10 cores (but not so much that its a requirement to have those 2 extra cores, 8 will still cope with even some demanding needs).
For gaming, we would recommend sticking to 8 cores unless you are happy with paying significantly more for very minor gains.
Octa-Core vs Dodeca-Core / 8 Cores vs 12 Cores
With AMD being the only player with mainstream 12 core options right now, if you’re interested in this question, we imagine you’re looking at the difference between something like the Ryzen 7 5800X vs Ryzen 9 5900X.
In this case, we would say the 12-core option is reserved for those after a premium productivity machine who significantly rely on intensive processing throughout their day-to-day operations.
For gaming, we would only recommend 12 cores to those who absolutely want the most power out of their desktop, as there are some diminishing returns for the price-tag.
That’s the best way to sum up this head-to-head for most users; 8-core is the better value option for mid-range builds, 12-core is for those more interested in maximum performance over budget concerns.
Octa-Core vs Hexadeca-Core / 8 Cores vs 16 Cores
Although we see this question asked, the difference between 8 cores and 16 cores is becoming so much that it’s a bit of an “apples and oranges” question.
All general users and most productivity users should stick to 8 cores between these two options, which will already provide fantastic power for a large majority of operations.
16 core+ is only recommended today for advanced users with dramatic production/server requirements; we do not recommend going as far as 16 cores for gaming (unless you don’t really care about your wallet!).
Deca-Core vs Dodeca-Core / 10 Cores vs 12 Cores
This head-to-head is a little hard to quantify, as 10-core is where Intel has focussed their higher-end 10th gen options, and 12 core+ is where AMD has defined their premium 5000 series CPUs.
So really, the battle will usually be if you are after a CPU that focuses more on single-core performance (Intel) or more cores/threads (AMD).
In general, we’re more impressed by AMD’s latest 12+ core options and think this will suit more users in this price-range who are likely looking at productivity builds that will benefit from an increase in cores.
Dodeca-Core vs Hexadeca-Core / 12 Cores vs 16 Cores
The only users this question should apply to are those after a very high-spec production machine. Gamers (with finite wallets) will be fine with 12 cores or less, and even advanced productivity machines will get a lot done on 8-12 cores.
So 16 cores and beyond are really reserved for HEDT CPUs that may be needed by large software companies, animators, high-spec production users, and similar. Our honest opinion is that if you’re an individual builder, you almost certainly don’t need 16 cores and we’d only get it if it’s a luxury you can afford comfortably.
Single-Core vs Dual-Core / Multi-Core
We wanted to add this head-to-head just for completeness but realistically, nobody today should build a single-core desktop PC (unless you have some weird nostalgia for it, you may have a hard time finding them though!).
Gaming or not, most applications take advantage of multi-core/threading capabilities and the industry has moved well away from 1 core CPUs, so whatever your build requirement, go for 2 as an absolute minimum.
Final Word
And there you have it! The above is everything we think you need to know about what makes a CPU good and how to pick for your next build.
Feeling overwhelmed? We understand!
We’ve mentioned this point a few times in the feature but it’s worth re-iterating one last time: you don’t need to know every part of the CPU to make a good purchase.
Stay close to our recommendations above depending on your type of build, you can’t go too wrong as long as you’re buying a CPU that’s current-generation (Intel 10th gen/Ryzen 5000 series) and in your budget!
Kaelum Ross, BSc is the Lead Writer at What in Tech and a leading authority in PC hardware and software. With a career as a senior IT professional, Kaelum has led multi-million dollar projects covering everything from bespoke software development to complex Windows hardware upgrades. Today, Kaelum uses his expertise to serve What in Tech's readers and has been featured in numerous global publications including New York Magazine and Lifewire.
This feature was reviewed in January. The recommendations in the piece have been updated and the information has been fact-checked for accuracy in 2025.
Sizing up your motherboard is a big deal.
What is an ATX motherboard anyway?
Who wins in the battle between E-ATX vs ATX vs mATX vs mITX?
Whatever the question, we’ve put together this guide to explain the differences between motherboard sizes.
Note: Sizes are approximations, check product listing for exact dimensions
Form Factor
Pros
Cons
E-ATX
• Best for the most powerful PC builds
• Up to Quad-GPU/8 x DDR4 RAM support
• Fantastic overclocking/cooling options
• Best for high-end, production, and servers PCs
• Most expensive
• Very large/bulky
• "Overkill" for many users
ATX
• Best "all-round" option
• Plenty of GPU/hardware room
• Fantastic overclocking/cooling
• Lots of ATX case styles available
• Perfect for most gaming PCs
• Still quite large/heavy
• More expensive than Micro ATX
Micro ATX
• Best budget motherboard
• Compact with stylish case options
• Dual-GPU possible
• Most have 4 x RAM slots
• Good part compatibility
• Dual-GPU setups may be hard
• Less cooling/overclock potential
Mini ITX
• Smallest motherboard size
• Perfect for a portable build
(e.g. a VR demo / LAN party PC)
• Cheap motherboard/case options
• Most mITX cases look fantastic
• Single GPU build only
• 2 x RAM slots
• Limited space for other features/cooling
• Harder build due to size
• Effort needed to find parts that will fit.
Motherboard Sizes Explained
E-ATX Motherboard
The largest of the main types. An Extended-ATX motherboard is for builders focussed on building the most powerful PC possible.
This mobo form factor is designed to work alongside a full tower PC case, providing you with incredible space/features.
This often includes support for Quad-GPU builds and 8 RAM slots (which could achieve up to 256GB of memory).
Not to mention the breathing room to cool all of these components with immense overclocking potential.
E-ATX cases, with their massive size, will often be good for part compatibility (with many popular components being based around hosting ATX motherboards, cases designed to included EATX mobos can essentially fit things like most mainstream power supply units with more room to spare).
Perfect for very high-end enthusiast gaming & production (editing, rendering, etc), an E-ATX motherboard will open up some great utility with its large size.
Note that there are, of course, diminishing returns when building such a powerhouse.
If you’re the average gamer or don’t need the best PC money can buy, E-ATX is often going to be overkill (with SLI/Crossfire support becoming less common in games now).
The real benefits will be to those who can make use of the GPUs independently, like a high-end video editing or crypto mining rig.
The boards are very expensive and alongside an E-ATX case, are enormous. Make sure you have space.
That being said, if you care less about the budget and more about the most power possible, this is the size for you.
ATX Motherboard
The mid-tower motherboard. This motherboard form factor is what many would consider the “standard ATX” option and has reigned as the most popular size for a long time, and for good reasons.
When considering EATX vs ATX, sure the latter will have slightly less space for high-end desktop computers.
But ATX boards still have everything important to the majority of gamers/enthusiast builds.
Including support for 2-3 GPUs, 4 x DDR4 RAM, plenty of SATA ports, more than enough expansion slots, and their ATX case-counterparts come with plenty of decent cooling options.
Even if it’s not the best motherboard for overclocking (that belongs to E-ATX), it’s still a very close second and will achieve what most gamers need.
The other great advantage is due to the popularity, there are so many good ATX mobos and combos with CPUs available at competitive prices. You’re also best placed for part compatibility, with a lot of power supply options being sized with ATX PC cases in mind.
An ATX build is still going to be fairly big with limited portability. Bear that in mind if you’re building an on-desk setup.
But overall, if you’re looking for the best “all-round” option, an ATX build is the way to go.
mATX Motherboard
While ATX may be the most popular overall, Micro ATX motherboards have been giving them a run for their money in the last few years.
Why? Well, the quality of this small form factor has dramatically improved over the last several years for both Intel and Ryzen motherboards, and the pc case sizes it runs with are a nice balance between space and compactness.
With a majority now having 4 x DDR4 RAM slots, good SATA connector availability, and even 2 PCIe slots for a small SLI/Crossfire GPU build.
This is the smallest PC build you can create while still accomodating a majority of mainstream components.
Note that as we get to this size, running a dual-GPU build will usually get cramped and isn’t ideal.
It’s certainly possible, but the preference would be to stick to a single graphics card (with the utility to overclock).
As we discuss further below in our top picks, the Micro ATX motherboard size nails affordability.
If you want something compact/cheap but not so small that you have to be extra careful with your hardware choices, this is the pick.
mITX Motherboard
And then there are those looking for the smallest PC possible.
A Mini-ITX build is for those very focussed on portability or a compact style (e.g. LAN-party build, HTPC, or perhaps a streaming computer).
With such a tiny size, you’re of course compromising on feature availability.
Most Mini-ITX mobos come with 2 RAM slots (still providing up to 64GB), a single PCIe slot, and limited SATA ports.
The cases that support them are also on the smaller side. Leading to limited ventilation/cooling. You’re going to struggle with overclocking.
With this small size, you will need to pay more attention to the other parts you buy (most notably GPU/PSUs).
This can often include having to buy parts that are a bit more expensive (usually offset by the cheap motherboard and cases, however).
With all that being said, the convenience of a portable PC is massive and compact builds often look fantastic.
If this is what your heart is set on, don’t fret! You can build a great gaming computer on a Mini-ITX motherboard, and our guides on motherboard CPU combos/PC cases include ITX options.
How to Choose a Motherboard Size
Ahead of giving you our top picks, we’ve broken down the key criteria for what to look for in a motherboard.
Just know that not all these factors will be important to you individually (many people don’t need to worry about having more than a few SATA ports, etc.).
Don’t be overwhelmed by all the factors, just focus on what’s important to you, and check out our recommendations if in doubt.
Form Factor / PC Case Size
Let’s start with an obvious one.
Whatever motherboard you pick, you want to make sure that you have an appropriately sized case to go with it (e.g. E-ATX case for an E-ATX motherboard).
But in short, the type of motherboard you want will probably also guide the case size you need anyway (e.g. if you’re looking at a smaller motherboard, the case will have fewer hardware space/cooling options, but that’s the trade-off for portability).
CPU compatibility
Although not explicitly related to size, this one is worth covering as it’s one of the most important buying factors.
When purchasing a motherboard, make sure it’s compatible with the CPU you’re looking at.
BGA is more for manufacturers and not worth considering for your individual build.
Note: this isn’t universal, you may (rarely) in the future see an AMD CPU on LGA – but this will usually be very clear in a listing.
The most common socket types right now are LGA 1200 & LGA 1700 for Intel, and AM4 & AM5 for AMD.
Intel LGA 1200 vs LGA 1700
LGA 1200 offers support for 10th and 11th Intel CPUs which, while still plenty powerful for most builds, are previous generation processors now.
LGA 1700 is the latest and greatest from Intel and uses 12th-generation CPUs, and if you’re building a new Intel personal computer, it would make sense to go for the latest socket/CPU range.
While the 1700 series is more expensive, there are now enough options that it’s even suitable to get one for a cheaper build (with 12th gen budget CPUs also available).
If your budget is VERY low, or you already have a 10th/11th gen CPU to use, then know that the LGA 1200 socket still has plenty of decent options that can host a decent PC.
There will be more terms in this area that will probably confuse you like Z370 vs z390 (which is mainly just a difference in wifi/USB compatibility).
Instead of learning every chipset (there’s a lot) – we’d recommend a beginner check the product listing to see.
We’ve only provided this info for the full picture. Once you’ve found the CPU you want, it’s pretty clear what a motherboard supports in the product listing like below:
This motherboard supports Intel 8000 and 9000 series, and there’s an LGA1200 version for the 10000 CPUs. The product listing will then talk about the kind of features included based on the chipset on offer.
Let’s take the LGA1200 motherboard just linked as an example; this model has a Z490 chipset, which will have features for enthusiasts like overclocking capabilities, high-quality ports/Wi-Fi, and good capability for M.2 storage).
Assuming you’re buying a popular motherboard/CPU combo, it’s usually really easy to find out if your desired CPU is supported with that motherboard, and what kind of audience it’s catering to by reading some of the product description.
PCI Slots
PCI slots are what host your external components, the most common one being graphics cards (in PCI Express/PCIe slots).
The larger your motherboard size, the more PCIe slots you will (usually) have available.
An E-ATX motherboard, for example, will often have 4 PCI-e 3.0 slots, allowing for a 4-way GPU PC.
As we made clear in the EATX mobo section, however, more doesn’t mean better for gaming unless you’re a very high-end enthusiast who is happy tweaking things (or a production user/high-end editor). Most gamers will be fine with a board that has 1 or 2 decent PCIe slots (which a huge majority of motherboards have now, as most are catering to gamers).
Aside from GPUs, other PCI slots are often included if you have other focuses (e.g. installing a high-quality independent sound/network card).
Just know that you’ll usually have to put them in a place that blocks you from fitting an extra GPU if you are wanted to install multiple ones.
That’s the beauty of a large motherboard though. Not many people need 4 GPUs, so those PCIe slots can come in handy for other things if needed.
PCI-E x4 vs x8 vs x16
When looking at PCI-E slots you may notice the different numbers next to them (i.e. PCI-E 3.0 x4/x8/x16).
Putting it simply, a motherboard can only circulate a certain amount of data/bandwidth at a time.
So if you have a lot of PCI-e slots, some of them will be x4 – x8 which means they can’t output the same bandwidth as your main x16 slot/s.
But: There have been many benchmarks on what the performance difference is between these types.
The difference between PCIe x4, x8, and x16 is very minimal for performance/gaming.
We’re talking a couple of FPS in games.
This is because most GPUs don’t come close to actually requiring the x16 power that an x16 slot provides.
Whichever x type, you’re still going to be getting a majority of the card’s power overall. Although to state the obvious, your GPU is nearly always the component that should be in the highest bandwidth slot.
SATA Ports
Larger boards will often come with more SATA ports to allow you to connect more SSDs, HDDs, and optical drives.
For most gaming builds, you’ll have more than enough SATA ports for your requirements on most boards.
However, it’s worth checking if you’re purchasing an mATX / mITX motherboard to ensure you have enough.
It’s only if you’re building say, a video editing PC, or if you have other requirements that means you want to install a lot of storage/other components, should you be too worried about confirming these beforehand.
Miscellaneous
NVMe M.2 Storage
M.2 storage is becoming increasingly popular over the standard 2.5″ SSDs / 3.5″ hard drives and worth your consideration if you’re all about speed.
It’s a type of solid-state drive that larger motherboards have become more compatible with over the last few years.
M.2 SSD vs SSD (2.5″) – An M.2 SSD installed via NVMe is around 5 times faster than a SATA-installed SSD.
Note that this is during benchmarking. In real terms to the user, this will likely be around 2-3 times faster (still nothing to complain about!).
These storage units are of course a lot more expensive (here’s our top pick) but run like a dream when you’re installing your OS and common apps on there.
If you like the sound of this, we recommend looking at an ATX or E-ATX motherboard.
You might be able to squeeze out the utility for an NVMe M.2 within mATX but it will likely mean the board is sacrificing bandwidth somewhere else.
Most motherboard listings will detail their support for this storage type so don’t fret about compatibility too much.
Just make sure to get an NVMeM.2 SSD (SATA ones perform similarly to a 2.5″ SSD) – here’s our top pick.
RAM slots
A majority of motherboards from E-ATX to Micro ATX will provide a minimum of 4 x DDR4 RAM slots.
The smallest form factor, mITX, tends to come with a maximum of 2 x DDR4 RAM slots.
A better motherboard can be beneficial for RAM as on top of having more slots, better motherboards tend to be more capable of working well alongside higher RAM speeds (though this is all mostly concerning to enthusiasts who want to mid-max performance; if you’re the average user getting confused, a mid-range motherboard will be more than powerful enough for gaming and more!).
It’s also nice to have RAM slot options as more RAM sticks are marginally more effective than overall storage (e.g. 4 x 8GB RAM is better than 2 x 16GB RAM for most users).
We wouldn’t worry about RAM compatibility too much unless you’re running some high-quality production/editing/streaming computer.
If you do have specialist requirements, high-end E-ATX/ATX motherboards include up to 8 RAM slots/256GB capability!
I/O Panel
The features available in an I/O back panel will typically increase not just with chipset (which allows your mobo to support more inputs, e.g. USB 3.1 type C) but also the size.
E-ATX/high-end ATX motherboards often have a host of great ports available.
Smaller motherboards will usually have the standards though (some USB/audio ports) but check that your choice will have what you need, or you have a suitable extender.
Extra features
Finally, there are all the extra bells and whistles motherboards can come with.
Typically, larger motherboards include more of these features as it’s easier for the manufacturers to add.
We would say it’s often preferred to buy a standalone sound card or network card if you have PCIe slot room (not essential if your budget is tight, though).
Even Mini-ITX boards can come with these features integrated, just know that you may not get quite the same quality as large integrations or standalone cards.
That being said for smaller builds, we’d recommend getting integrated versions of features you need where possible so you’re not having to use your very finite USB/PCI inputs.
Which Motherboard Should you get?
Best budget gaming motherboard
If your focus is on affordability above all else, go with Micro ATX.
While you may not get the same features as E-ATX/ATX you’re not going to need them for a cheap build.
Things like excellent cooling/space for multi-GPU builds aren’t so important for a cheap gaming PC where you should be focussing on 1 graphics card.
Micro ATX builds are the perfect balance between being small enough for good mobo/case affordability while not so small that you have to fork out more money/effort for “specialist” small parts.
For most builders, the sweet spot is an ATX motherboard for gaming.
With all the feature a large majority of builders need, good space for parts/cooling in their compatible cases, and lots of choices, ATX mobos are perfect for most setups.
Even if you don’t need every PCIe/SATA/RAM slot, know that having an ATX case/motherboard gives your parts more room for ventilation (and makes the build process easier).
Now let us be clear: the options above will be enough for a majority of readers.
But, if you’re less concerned with budget and more with creating the most powerful PC you can, then you want to look at an E-ATX motherboard.
These will give you the most space and utility possible with no compromises made for compactness.
This is what makes them appealing not just for gaming, but for someone looking for the best production PC possible (video editing, rendering, etc).
Not to mention the large cases that come with the most room for cooling, drives, and ease-of-build.
In fact, even if you wanted an ATX motherboard for your high-end build (also doable), we’d recommend looking at E-ATX full tower (or “super tower”) cases for the best airflow/cooling options as long as you don’t mind the size.
Our top picks for the best E-ATX motherboards for gaming:
Finally, there are those after the smallest motherboard for a portable build or HTPC.
It will come as no surprise that Mini ITX motherboards are the best option for you if this is what you’re hunting for.
Yes, as we’ve discussed, you’re losing out on some hardware compatibility and other features with a PC this small.
But combined with a high-quality case and some consideration for which parts you’re going to buy (ensuring they fit), you can still create a gaming PC capable of LAN parties or streaming.
XL-ATX motherboards are another form factor that traditionally are a similar width to E-ATX, but a bit longer.
We’ve chosen not to include them in our guide for a couple of reasons:
This size type is super uncommon and the options available aren’t great.
The use-cases are incredibly specific, given you can build anything from a powerful server to gaming PC on an E-ATX mobo, we’d wager XL-ATX isn’t necessary for anybody reading this.
Similarly to “full tower vs super tower”, XL-ATX is loosely defined and is a marketing term as much as it is a legitimate form factor. A lot of “extra-large motherboards” are E-ATX or even ATX anyway.
Short answer: don’t worry about Xl-ATX.
ATX vs BTX?
BTX (balanced technology extended) is a format that was originally meant to replace ATX (advanced technology extended) with superior cooling and other quality of life improvements for manufacturers/users.
However, with different mounting hole alignments and the need to develop different products to support them, BTX motherboards never took off, and are essentially redundant today.
Short answer: BTX is no more, go with ATX.
What is Nano-ITX?
Technically Mini-ITX isn’t the smallest form factor, Nano-ITX used to offer even smaller motherboards to build the tiniest PCs possible.
The key words there are “used to” however. Nano-ITX motherboards don’t exist in the mainstream in any capacity now; if you do see them, they are likely old, or not supportive of modern CPU/GPU/RAM hardware.
Short answer: If you want a small form factor motherboard, go with Mini-ITX.
What order should I pick PC Parts?
Reading this guide and the criteria for selecting a motherboard, you may be confused as to how you should build your PC (e.g. do you pick a compatible motherboard for your chosen CPU or vice versa?).
It’s a bit of a “chicken and egg” situation, there’s no “right” order to pick parts in.
But here’s the outline we would recommend for most confused builders (from first to last):
Kaelum Ross, BSc is the Lead Writer at What in Tech and a leading authority in PC hardware and software. With a career as a senior IT professional, Kaelum has led multi-million dollar projects covering everything from bespoke software development to complex Windows hardware upgrades. Today, Kaelum uses his expertise to serve What in Tech's readers and has been featured in numerous global publications including New York Magazine and Lifewire.
All the information and picks needed to find the best choice for your build
2025 update: We’ve updated this feature in January to cover some updated recommendations and minor information tweaks.
When you’re looking to build your PC and you’ve arrived at selecting RAM, it can feel overwhelming to know the right GB, MHz, and CL measurements for your needs.
This is why today’s What in Tech feature will be taking you through everything you need to know about RAM, from common speed versus speed questions and which spec matters most in your decision.
We’ve also included the best RAM choices available with different budgets in mind.
This is a long guide, the contents table below is your friend! Look specifically for the questions & recommendations that interest you instead of reading top to bottom!
Table of Contents
What is RAM Speed?
For the average PC builder, the capability of Random Access Memory (RAM) is measured by 3 key fundamentals: frequency, latency, and size (technically, size isn’t speed-related – but for the purpose of establishing what RAM is best for you, we’ll be covering it).
RAM Capacity / Size
RAM size is, as the name suggests, the overall capacity of the memory you’re buying. 4GB, 8GB, 16GB, 32GB and 64GB are the most common sizes right now.
Additional capacity means your PC will have the ability to run more programs simultaneously/switch between them more smoothly.
This is where the name “Random Access Memory” comes in. Your main storage (Solid State Drives, Hard Drives, etc.) are designed to offer much larger storage but are slower than RAM, which is why those drives are store your data and require a more significant loading time when opening them for use.
Once software/games/files are open, they then utilize your PC’s RAM, which is faster than your SSDs/HDDs, so that they can be “randomly accessed” quickly during use.
A common metaphor to explain the difference is that RAM size is almost like your desk, and the more capacity you have, the larger your desk is (meaning you can have more items in arms reach ready to quickly use).
While your hard/solid-state drives are the size of your shelves, drawers, and cabinets; these are used to store most of your items and take a little longer to take out for use on your desk.
Generally more RAM capacity is better, but there are diminishing returns (we’ll get back to that).
RAM Clock Speed / Frequency
Clock speed or frequency is a RAM’s MHz rating (nowadays, most RAM will be in the 2400Mhz to 4400MHz range).
Faster clock speed allows your processor to retrieve data located on your storage drives more quickly. Reducing the time it takes the CPU to access this data increases your performance in real-world scenarios and games.
Clock speed is measured in Megahertz (MHz) which indicates how many times per second your RAM can access its memory (as you probably expect, more is better, but we’ll speak further below about the sweet spot between price and utility).
CAS Latency
The last key part of the equation is Column Access Strobe or CAS latency (often just “CL”) which is integral in understanding RAM speed and often overlooked compared to a stick’s MHz rating.
CL indicates how long it takes your RAM to recognize a command/action (similar to how a monitor has latency between receiving your mouse click and outputting the result visually).
The latency is usually recorded by 4 numbers in the following format: 16-18-19-30 which represents the number of clock cycles it takes for the RAM to register a command. It is the first number from the 4 that is typically used to establish CL. Nearly all popular RAM today is between CL 12 & CL 18 (mostly CL14-16).
We talk more about how to balance latency and clock speed below. But to demonstrate why both are important, think about it: if you have very fast RAM, but the latency is high, it would be like gaming on a high-refresh-rate monitor but each of your actions takes a second to register (a dramatic example, but you get the point…).
How much does RAM Speed Matter?
So, we’ve established at a high level what the integral parts of RAM are for your build.
But how much does RAM speed matter?
The short answer is that for business and personal use (web browsing, e-mails, basic software, Netflix, etc), you’ll likely be fine with any 8GB (ideally 16GB) RAM from a reputable manufacturer.
If you’re into gaming or plan on using your build for production work like video editing, game development, or rendering, then the speed can have a more notable impact.
How much does size matter for RAM – 4GB vs 8GB vs 16GB vs 32GB vs 64GB
Of all the specs, size matters the most.
So if your battle is faster RAM vs more RAM (i.e. CL / MHz vs GB), we’ll nearly always recommend the latter option.
That said, RAM size does have diminishing returns. 16GB or 32GB is what we recommend for most users, 8GB for tighter budgets, and 32GB or 64GB for high-end enthusiasts. Beyond that, there isn’t really much use (even 64GB is pushing past the realm of necessity unless you’re doing production work). If this sounds confusing, we detail the best RAM options towards the bottom of this guide.
How much does RAM clock speed matter?
Clock speed matters, but not as much as you may think.
You can build a powerful gaming PC with 16GB 2400MHz DDR4 RAM for instance (which is on the lower side of clock speed). Would it be better to have say, that 16GB of RAM at 3200MHz+? Absolutely! But it’s not a deal-breaker to have lower speeds if your budget is tight or you’re simply not bothered about fine-tuning potential performance/game FPS.
If you’re building a PC purely for basic business and personal use, we would suggest that cheap RAM will suffice for you as long as the size is large enough.
We do however see lots of unanswered questions from users around the difference between X MHz and Y MHz RAM. Which is why further below, you’ll find our comparison list as a quick guide to help you decide between two types of memory.
How much does latency matter for RAM
The most overlooked RAM speed factor, CL, is kind of like clock speed; it matters, but shouldn’t be a huge deciding factor in your PC building decisions.
A higher latency RAM (say, CL18) could still be perfectly decent if its other specs were around 16GB/3200MHz, RAM size is still the most important thing overall.
That isn’t to say that if you see CL12-CL14 RAM, you shouldn’t absolutely go for it if the other specs are decent (especially if you’re building a gaming PC or something for production work). But in the context of price/value, these low latency sticks are often 30%+ more expensive, which we can’t say is worth it unless you are trying to build the all-around most powerful computer possible.
RAM Speed Comparison FAQ
DDR3 vs DDR 4 – How much faster is DDR4
DDR4 is essentially the next natural iteration from DDR3. With significantly great size capacity & higher clock speeds, 4 is notably faster in nearly every case (latency is slightly higher on 4, but is made up for with the other specs).
In nearly all cases today, we would say pick up DDR4 RAM. It is overwhelmingly what the current market motherboards/CPUs are best compatible with.
The right question isn’t really “is DDR4 worth it” anymore in terms of speed. Because of its widespread market adoption, prices on this RAM are great. You’ll typically be getting faster RAM with little consequence compared to DDR3.
The only scenario we see DDR3 as worthwhile today is if you’re building an ultra-cheap PC and have specifically found a motherboard/CPU combo that supports 3 and not 4 (we don’t like this from a future-proof perspective and would try to stick to 4, but it could make sense if you need to be as cheap as possible).
DDR4 vs DDR5 RAM?
DDR5 RAM offers 50-100% higher clock speed than DDR4, a slightly lower voltage, and individual RAM sticks that can go up to 64GB each (the max with DDR4 is 16GB).
This sounds great on paper. But at this time, these ultra-high clock speeds/sizes lead to huge diminishing returns in pretty much all PC activity (we talk more about this in our comparison of higher MHz RAMs further below) so in reality, that 50-100% “theoretical” performance increase may not be super noticeable unless you’re building a very high-end machine (and in nearly all cases, the money would be better spent on a better CPU/GPU).
As it stands right now, I would recommend focusing on whichever DDR fits yours motherboard and budget, DDR5 would be great for a high-end build, but even then, a decent DDR4 set would still be more than enough for basically everyone.
What RAM Speed should I get?
The million-dollar question! Unfortunately, the answer isn’t clear-cut, as it depends on your budget and requirements.
A reasonable rule of thumb is to commit to at least 16GB RAM size-wise. Then from there, try to aim for a balance between CL/MHz between CL14 2666MHz & CL16 3200MHz.
To make it easier for you, the bottom of this guide details the best RAM picks today. If you want more autonomy on your choice, we’ve built the RAM speed quick-reference list further below too.
More RAM vs Faster RAM (Size vs MHz/Latency)
We’ve touched on this already, but it’s worth re-iterating: size is way more important than MHz & latency for nearly all users.
As an example, 2400MHz 16GB RAM will be better than 3200MHz 8GB RAM. The only time we’d pick MHz/latency improvements in this kind of bracket is if your remaining budget can’t jump up to a larger size, but could be squeezed slightly further to accommodate faster sticks.
The other exception to this rule is if you’re buying very large RAM. If you have 32GB in memory, we can’t imagine more will be required for a long time (unless you’re creating a very high-end production machine). At this point, if you still have the budget, it will be usually better to focus on faster 32GB RAM than slower 64GB+ memory.
MHz vs Latency – which is more important for RAM speed?
The difference between MHz and CAS latency value is a difficult question as the best approach is for there to be a balance between these 2 factors (instead of very fast frequency/slow latency or vice versa).
The “sweet spot” for most users today (particularly gamers) with the price in mind is around CL14 2666MHz to CL16 3200MHz.
Now you can fall outside of these balances (e.g. plenty of RAM sticks offer CL18 latency but make up for it with significantly more frequency or lower prices) but we would use that range as the rough spot to go in unless you’re building something high-end and are trying to get extra-low latency and high MHz.
RAM Speed Importance for Intel vs AMD
The main function of RAM speed is to empower your CPU and its ability to retrieve/store randomly accessible data easily.
So your CPU is indirectly an important factor in deciding how much to invest in RAM speed. For example, if you’re buying a high-end CPU, you’ll achieve more value from spending extra on fast RAM (as lower speeds can bottleneck certain CPU operations).
When it comes to the Intel vs AMD builds, it’s complex as the impact on speed depends on the chipset & model version. But as a (mostly reliable) rule of thumb: AMD CPUs/builds benefit more from better RAM speeds than Intel due to the way its memory controllers operate.
This is not to say RAM speed doesn’t matter for Intel CPUs however. We’ve seen many RAM benchmarks show games and various software processes perform notably better with higher frequency/lower latency memory on Intel chipsets.
CL 12 vs CL 13 vs CL 14 vs CL 15 vs CL 16 vs CL 17 vs CL 18
Our comparison list just below focuses on the difference between MHz as we often see reader questions specifically asking about the frequency differences.
But as made clear in this guide, latency is as important as the frequency in deciding RAM speed.
For example, the difference between CL14 and CL16 is usually more significant than the difference between 3000MHz and 3200MHz. But focussing all on latency (or all on clock speed) introduces diminishing returns, which is why considering both factors is important.
Unfortunately, it’s not a simple balancing act between the two measurements, as you’ll often see companies sacrifice low latency for high speed, or charge a lot more to ensure both specs are good.
We’ve detailed some of the best RAM available today at the bottom of this guide to make it easier for you. But if you do want to decide yourself, we would try to stick to the previously mentioned “sweet spot” of between CL14 2666MHz to CL16 3200MHz for mid-range builds, or you can seek faster/lower latency sticks if you have the budget.
RAM Frequency Comparison Quick Reference List
RAM Frequency/Speed Comparison Chart (How to use)
We appreciate that despite all the info/FAQ answers above, many manufacturers produce things in a large array of different frequencies/MHz and you may be struggling to choose between 2 or 3 narrowed options.
We’ve created the below reference list as a quick guide to help you on the most common user head-to-heads based on RAM speed benchmarks.
Don’t feel the need to read every one of these – it’s just for quickly assessing the difference between speeds if you have 2 in mind!
CL / Timing vs MHz / Frequency
The below list assumes that every RAM stick you’re looking at is the same CAS Latency.
It’s important to note that for computer processes (especially games), while higher RAM frequency and lower CL timings are always better, there is usually a “sweet spot” for mid-range budgets, otherwise, you risk buying RAM sticks with high speed but high CL timings (or vice versa).
For example, CL14 3200MHz RAM would be better for gaming than CL16 3600MHz RAM, so make sure to balance picking between both.
If that sounds complex, don’t worry! Just below the comparison list, we’ve included the best RAM choices depending on your budget level.
RAM Frequency Comparison List
DDR4 2400MHz vs 2666MHz
2666mhz will provide a slight improvement over 2400mhz (particularly in AMD builds).
For gaming, this will translate to a couple of extra FPS in some CPU-intensive titles (i.e. only go 2666MHz if it’s close to the same cost).
DDR4 2400MHz vs 3000MHz
The speed difference between DDR4 2400MHz and 3000MHz still won’t be huge for a lot of gamers/other users but will be a fair bit more noticeable than 2666MHz.
Providing the RAM you’re eying has good latency (and size) you can expect 3000MHz to be the better choice if the price is only 0-10% extra.
DDR4 2400MHz vs 3200MHz
3200MHz RAM is a popular speed for many gaming RAM manufacturers. Combined with a good latency, this will often be a happy medium to ensure you don’t bottleneck a mid-range CPU motherboard combo.
2400MHz would be fine for cheaper builds but we’d recommend 3200MHz if your budget can accommodate it.
DDR4 2400MHz vs 3600MHz
If you are getting a high-end CPU, we’d recommend going with at least 3600MHz to ensure the RAM isn’t indirectly bottlenecking the performance during any processes.
If your budget is tight, you’ll be better off with 2400MHz and spending your money on at least 16GB of RAM size.
DDR4 2666MHz vs 2667MHz
The difference between DDR4 2666MHz and DDR4 2667MHz is non-existent. This is simply a marketing term used by companies who round up/down differently.
Buy whichever one is cheaper (assuming size/latency are the same).
DDR4 2666MHz vs 2933MHz
You may achieve an extra couple of FPS in games that are heavy on CPU requirements, but for the most part, there won’t be much difference between 2666MHz and 2933MHz.
2933 MHz also isn’t as popular for RAM manufacturers so we’d expect 2666 MHz to be more cost-effective (or if you do want higher, look at 3000MHz).
DDR4 2666MHz vs 3000MHz
Similarly to 2666MHz vs 2993MHz, the difference in speeds isn’t wide enough to be that noticeable so only pick up 3000MHz if it’s very close in price or you are keen to min-max gaming FPSs (if that’s the case, you may be better with the higher speeds further below).
DDR4 2666MHz vs 3200MHz
RAM speed increase of 3200MHz over 2666MHz will be a little noticeable/may achieve a few extra FPS on CPU-heavy games (or improve runtimes during certain processes, particularly for high-end processors and especially AMD Ryzen CPUs).
DDR4 2933MHz vs 3000MHz
While the difference between 2933MHz and 3000MHz isn’t non-existent, it’s pretty close to being completely meaningless for most builders (almost certainly <1 average FPS increase in all games at the most). We’d go with whatever sticks are cheaper/have better latency.
DDR4 3000MHz vs 3200MHz
You can expect a slight, modest speed increase when comparing the difference between 3000MHz and 3200MHz RAM, but don’t expect this to be more than a couple of FPS extra in processor-heavy games. So stick to whichever one is cheaper if all other specs are equal.
The one other thing to point out is that 3200MHz is a little more popular for RAM brands to produce, so your options might be better/more cost-effective.
DDR4 3000MHz vs 3600MHz
With a 20% MHz increase, at this point, you can expect the difference between 3000MHz and 3600MHz to be a little noticeable, albeit not essential if the 3000MHz RAM is notably cheaper (10% or more).
We like speeds of at least 3600MHz if you’re purchasing a high-end CPU (especially Ryzen/AMD) because these can occasionally be bottlenecked by lower frequencies in some operations (but we are min-maxing here, 3000MHz will be fine for most people).
DDR4 3000MHz vs 4000MHz
Is 4000MHz worth it over 3000MHz? Well, you can expect a nice performance jump in a lot of work-related processes (think rendering, editing, and other high-end production).
For gaming, RAM speed benchmarks tend to show around a 5% average FPS increase between these two frequencies. This is a nice jump, but if an FPS increase is your only focus, then the price difference may not be worth it. 3000MHz is enough for gaming on a budget/mid-range build.
DDR4 3000MHz vs 4400MHz
With nearly 50% extra frequency, there are certainly some notable improvements between these two frequencies. While you can expect a good performance increase in games (5% or so for many titles), the real value of going beyond 4000MHz will be in other processes like video editing and rendering.
But in real-world terms, we know a reader’s real question will usually be “is 3000MHz RAM good enough for gaming”. And the short answer is yes, you’ll likely see diminishing returns cost-wise unless you’re running a high-end processor; so 4400MHz will not be worth it for budget/mid-range builds unless the cost is similar (if you want higher 3600MHz-4000MHz will give you similar gaming results).
DDR4 3200MHz vs 3600MHz
If possible, we’d recommend at least 3600MHz if you are doing some high-end production work (rendering, video editing, etc.) and are invested in the time processes take.
For gaming, 3600MHz may be slightly better for CPU-intensive games, but not particularly notable (i.e. not worth paying more money for if FPS is your only focus as we fine 3200MHz is often the best value for RAM).
DDR4 3200MHz vs 4000MHz
Similarly to the difference between 3000MHz and 4000MHz, you can expect something close to 5% increase in many CPU heavy games, whether you think this is worth it is really down to your personal opinion and the price difference (we will say that 3200MHz is the most popular RAM speed today, so often has some good offers from big RAM manufacturers).
The real value for most users will come from if they do high-end work on their setups like video editing and other production. Unless you’re building a premium gaming PC, we don’t think the difference will be too important here.
DDR4 3600MHz vs 4000MHz
As discussed in earlier speed comparisons, RAM speed benchmarks for 3600MHZ, 4000MHz, 4400MHz, and beyond have shown that there begins to be diminishing returns for gaming.
If you have a high-end CPU (especially Ryzen), then you may get your money’s worth, but otherwise, we’d only recommend 4000MHz+ for video editors and intense computing.
DDR4 3600MHz vs 4400MHz
For gaming, the difference between 3600MHz and 4400MHz is small for most titles as there is diminishing returns at this frequency level for most titles (the only exception being if you’re running a very high-end AMD CPU to avoid any slight bottlenecking) therefore we’d only say 4400MHz is worth it if you are focussed on making your high-end production/editing work more efficient.
DDR4 4000MHz vs 4400MHz
We wouldn’t consider the difference between 4000MHz and 4400MHz RAM for gaming important (unless you really want to future-proof RAM, but we’d say it would be more cost-effective to buy cheaper and upgrade to DDR5 when it is popular in a few years).
For video editing, rendering, and other production work, you can expect to see a little jump in performance and it may be worth it if the price increase is in the realm of 10-15%.
DDR4 4400MHz vs 4600MHz
A difference of less than 5% frequency at these high levels is really not that integral to any performance, whether you’re building a gaming rig or a high-end production setup.
4600MHz is only worth it if it is very close to the same price as the 4400MHz sticks.
The Best RAM for Gaming and Other Builds
Feeling overwhelmed by all of this detail? Don’t worry, here’s our quick list of the best RAM picks available today for varying budgets.
Best Overall RAM: CORSAIR Vengeance DDR5 RAM 32GB
Great value, decent speeds, good size and from one of the best RAM brands, this Corsairset ticks all the boxes we think a gaming (or mid-range production) PC will need.
At a very impressive value point, this Corsair RAM will suit most gamers on a budget who will be better placed spending extra on more expensive GPU/CPUs where possible.
Most Powerful RAM for High-End PCs: CORSAIR VENGEANCE RGB DDR5 RAM 64GB
At an impressive 6400mhz, CL30 with 64GB of size, the Vengeance is a fantastic offering for high-end gaming or production builds.
Yes, you can get technically do better than this, but diminishing returns will start to kick in more dramatically, our pick is based on still providing decent value despite this being an expensive set of memory.
Technically you can go cheaper with 4GB, but even if your build is just for business and personal use, we would recommend this great-value V-Color 8GB RAM as a minimum.
Being a single stick, you’ll also have the opportunity to add a second 8GB piece at a later date. Even at its small size/slightly lower speed, this memory will get a budget gaming build off the ground (if you’re very tight on money, it’s probably going to be best to invest in a better CPU/GPU and upgrade your memory later).
We’ve been over a lot of queries in this feature, and appreciate that learning about how to compare MHz, latency, and GB speeds can be a lot to take in.
So while we did make this guide to inform readers and give you the ability to maximize value from your RAM purchase, we’ll reiterate: the most important aspect is size.
If you buy one of our top picks above, or pretty much any DDR4 16GB+ RAM set, you will still get decent performance. So hopefully you’ve got what you need to know, but if RAM speed stresses you out, go with one of our recommendations or pick a popular 16GB gaming RAM choice, and move on to stressing about GPUs, CPUs, motherboards, and PC cases instead!
Kaelum Ross, BSc is the Lead Writer at What in Tech and a leading authority in PC hardware and software. With a career as a senior IT professional, Kaelum has led multi-million dollar projects covering everything from bespoke software development to complex Windows hardware upgrades. Today, Kaelum uses his expertise to serve What in Tech's readers and has been featured in numerous global publications including New York Magazine and Lifewire.